3 Proven Ways To Test Your Flask Applications With Pytest
As an application developer, delivering a functional, well-tested app is a top priority.
Most apps use external dependencies, like a data storage layer — database or file-based storage.
How do you make sure your app behaves the way it’s supposed to — even for edge cases? Well, you write tests.
But the next question is how do you test these database interactions?
Do you use a test database or an in-memory one? Should you use a flat-file instead to keep things light?
Or should you mock the database queries?
In this article, you’ll learn 3 ways to test your Flask-SQLAlchemy-Postgres application.
You will learn the pros and cons of each technique so you can choose the best one for your use case.
We’ll build a simple application using Flask, SQLAlchemy ORM, and a Postgres database.
We’ll then write tests using 3 ways, such as in-memory database, external database, and mocking.
To end, we’ll compare the outcomes and I’ll help you decide how to choose the best approach for your tests.
Let’s begin.
Flask Intro
Flask is a micro web framework written in Python.
It is lightweight, modular, and easy to use, making it an excellent choice for building web applications.
Why choose Flask?
- Simplicity: Flask’s straightforward design and minimal setup make it easy to start with.
- Flexibility: Flask allows you to customize and scale your application as needed without imposing many constraints.
- Extensive Documentation: Flask’s comprehensive documentation and active community support make problem-solving and learning accessible.
SQLAlchemy Intro
SQLAlchemy is a SQL toolkit and Object-Relational Mapping (ORM) library for Python.
It’s designed for efficient and high-performing database access.
Benefits of SQLAlchemy:
- ORM Capabilities: It allows you to work with your database using Python objects and classes instead of writing raw SQL queries.
- Database Independence: With SQLAlchemy, you can switch between different databases (like SQLite, and Postgres) with minimal code changes.
- Declarative Syntax: It’s declarative syntax makes defining and mapping your database tables straightforward and Pythonic.
PostgreSQL Intro
PostgreSQL (Postgres) is a powerful, open-source object-relational database system. It is known for its robustness, scalability, and advanced feature set.
Why use PostgreSQL?
- Reliability: Postgres is very reliable with ACID compliance, ensuring data integrity and consistency.
- Extensibility: It supports advanced data types and indexing, making it suitable for complex queries and large datasets.
- Community and Support: As an open-source database, Postgres has a vibrant community that contributes to its continuous improvement and offers extensive support.
Why use an ORM instead of Raw SQL?
You may be wondering — why can’t I write raw SQL strings and execute them using Psycopg2 or another library?
Why should I use an ORM library like SQLAlchemy or SQLModel?
Here’s why.
- Prevents SQL Injection: ORMs help mitigate SQL injection attacks by using parameterized queries and escaping user inputs.
- Optimized Interactions: Modern ORMs have better performance, generating efficient SQL queries and reducing the chances of human error.
- Abstracts Database Logic: ORMs abstract the database interactions, allowing you to write less boilerplate code and focus on your application’s core functionality.
- Simplifies Queries: With ORMs, you can write complex queries in a more intuitive and readable Pythonic syntax.
- Code Reusability: ORMs help reusability by enabling you to define database schemas and operations in a modular fashion.
- Database Agnosticism: Switching databases (e.g., from SQLite to Postgres) often requires minimal code changes, thanks to the ORM’s abstraction layer.
By using SQLAlchemy as an ORM with Flask and Postgres, you can use these benefits to create scalable, maintainable, and secure web applications.
OK, that’s good context, now let’s review our application.
Project Setup
Let’s get started with the coding.
Clone Repo
Clone the repository containing the example code or if you prefer to start from scratch you can do so by following the similar directory structure.1
2
3
4
5
6
7
8
9
10
11
12
13
14
15├── .gitignore
├── .python-version
├── docker
│ └── docker-compose.yml
├── poetry.lock
├── pyproject.toml
└── user_manager
├── app.py
├── models.py
└── tests
├── __init__.py
├── mocking
│ ├── conftest.py
│ └── test_user_manager_mocked.py
└── test_user_manager.py
We’ll be using Poetry to manage our dependencies and virtual environment so if you’re not familiar with Poetry I encourage you to start using it.
It’s a great tool that picks the best from pip, venv, conda, and others.
Install pyenv
I use pyenv to manage my Python versions but you can use any other tool.
Let’s set the Python version in the terminal to 3.121
2pyenv install 3.12
pyenv local 3.12
Install Dependencies
Our pyproject.toml file contains the dependencies.1
2
3
4
5
6
7
8
9
10
11
12
13
14
15
16
17
18
19
20
21
22
23
24
25
26
27
28[tool.poetry]
name = "pytest-flask-sqlalchemy-example"
version = "0.1.0"
description = ""
authors = ["Your Name <you@example.com>"]
readme = "README.md"
[tool.poetry.dependencies]
python = "^3.12"
flask = "^3.0.3"
flask-sqlalchemy = "^3.1.1"
psycopg2 = "^2.9.9"
python-dotenv = "^1.0.1"
[tool.poetry.group.dev.dependencies]
pytest = "^8.2.2"
pytest-mock = "^3.14.0"
[tool.pytest.ini_options]
addopts = [
"-v",
"-s",
]
[build-system]
requires = ["poetry-core"]
build-backend = "poetry.core.masonry.api"
To install dependencies, from the root of the repo run,1
2
3poetry env use 3.12.3
poetry env info # Verify
poetry install
This will create a virtual environment in your directory and install the packages.
You can also do this interactively using poetry init .
Now that you have a working environment, go through the source code.
Source Code
I’ve deliberately kept the source code as lean as possible to focus on illustrating the 3 key ways to test this app. Let’s go.
The source code is a simple user_manager Flask app that
- Creates a user
- Gets all users
user_manager/app.py1
2
3
4
5
6
7
8
9
10
11
12
13
14
15
16
17
18
19
20
21
22
23
24
25
26
27
28
29
30
31
32
33
34
35
36
37
38
39
40
41
42
43
44
45
46
47
48
49
50
51
52
53import os
from flask import Flask, jsonify, request
from dotenv import load_dotenv
from models import db, User
def create_app(app_config=None):
load_dotenv()
app = Flask(__name__)
# Get database URI from environment variables or use default
DATABASE_URI = os.getenv("DATABASE_URI", "sqlite:///:memory:")
if app_config:
app.config.update(app_config)
else:
app.config["SQLALCHEMY_DATABASE_URI"] = DATABASE_URI
app.config["SQLALCHEMY_TRACK_MODIFICATIONS"] = False
db.init_app(app)
def get_users():
users = User.query.all()
return (
jsonify(
[
{"id": user.id, "username": user.username, "email": user.email}
for user in users
]
),
200,
)
def add_user():
data = request.get_json()
new_user = User(username=data["username"], email=data["email"])
db.session.add(new_user)
db.session.commit()
return jsonify({"message": "User created"}), 201
return app
if __name__ == "__main__":
app = create_app()
with app.app_context():
db.create_all()
app.run(debug=True)
user_manager/models.py1
2
3
4
5
6
7
8
9
10
11
12from flask_sqlalchemy import SQLAlchemy
db = SQLAlchemy()
class User(db.Model):
id = db.Column(db.Integer, primary_key=True)
username = db.Column(db.String(80), unique=False, nullable=False)
email = db.Column(db.String(120), unique=False, nullable=False)
def __repr__(self):
return f"<User {self.username}>"
The above app has just 2 endpoints. Once you understand the concept of how to test this thoroughly you can extend it to any app of any complexity.
The app accepts a SQLALCHEMY_DATABASE_URI environment variable which can be Postgres DB but uses SQLAlchemy by default if not specified.
Now let’s fire up the app.
How To Run The Flask App
Start Postgres Database with Docker
Let’s use Postgres for this example, so start it with Docker. We have 2 databases, one for the app and one for testing.
docker/docker-compose.yml1
2
3
4
5
6
7
8
9
10
11
12
13
14
15
16
17
18
19
20
21
22
23
24
25
26
27services:
db:
image: postgres:latest
container_name: postgres_local
environment:
POSTGRES_USER: myuser
POSTGRES_PASSWORD: mypassword
POSTGRES_DB: mydatabase
ports:
- "5432:5432"
restart: always
volumes:
- postgres_data:/var/lib/postgresql/data
db_test:
image: postgres:latest
container_name: postgres_test
environment:
POSTGRES_USER: myuser
POSTGRES_PASSWORD: mypassword
POSTGRES_DB: mydatabase_test
ports:
- "5433:5432" # 5433 is the port for the test database
restart: always
volumes:
postgres_data:
Run the command to start the Postgres container1
docker-compose up -d

Set Environment Variables
You can set the database URL environment variable manually in the terminal, use a .env file or direnv — whatever your preferred way.
In this example let’s use a .env file.
user_manager/.env1
DATABASE_URI="postgresql://myuser:mypassword@localhost:5432/mydatabase"
Now our app with take the value during runtime.
Start Flask App
Use the following command to start the Flask App.1
poetry run python user_manager/app.py
If everything goes well, you should see

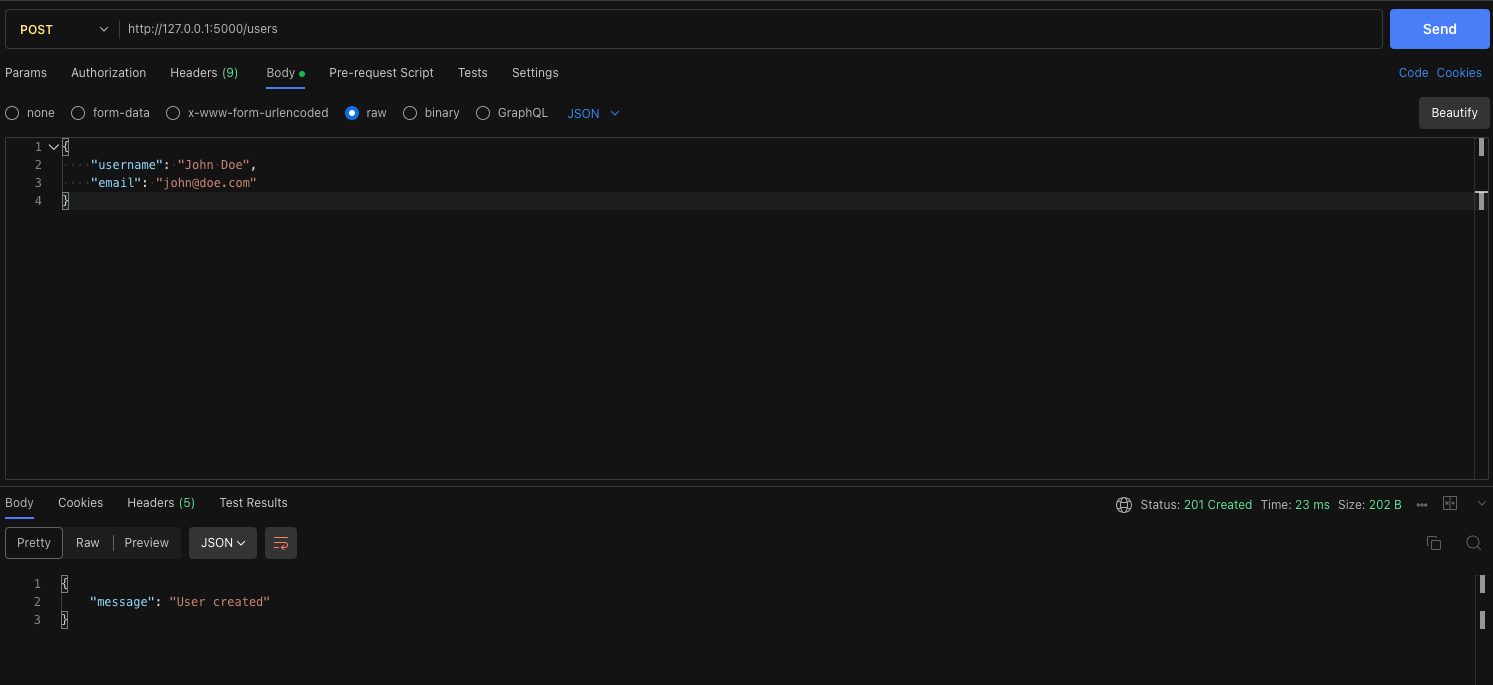
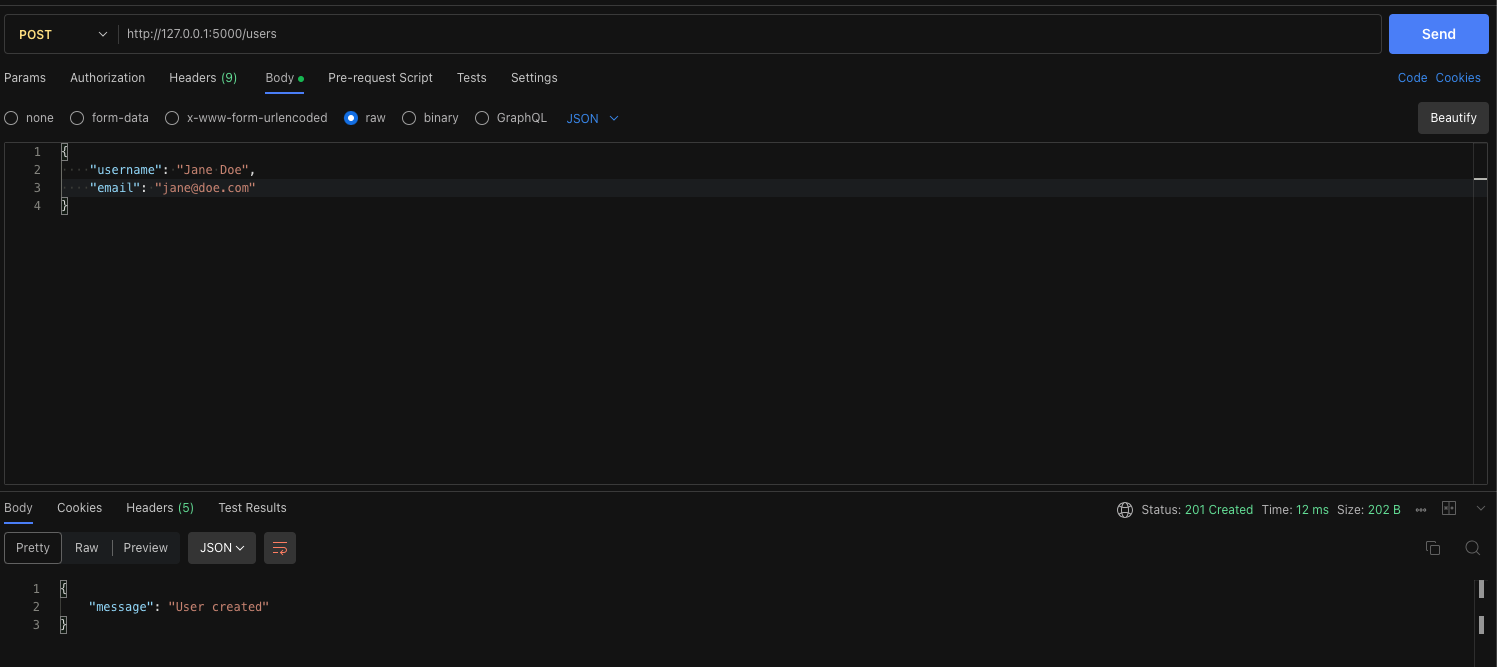
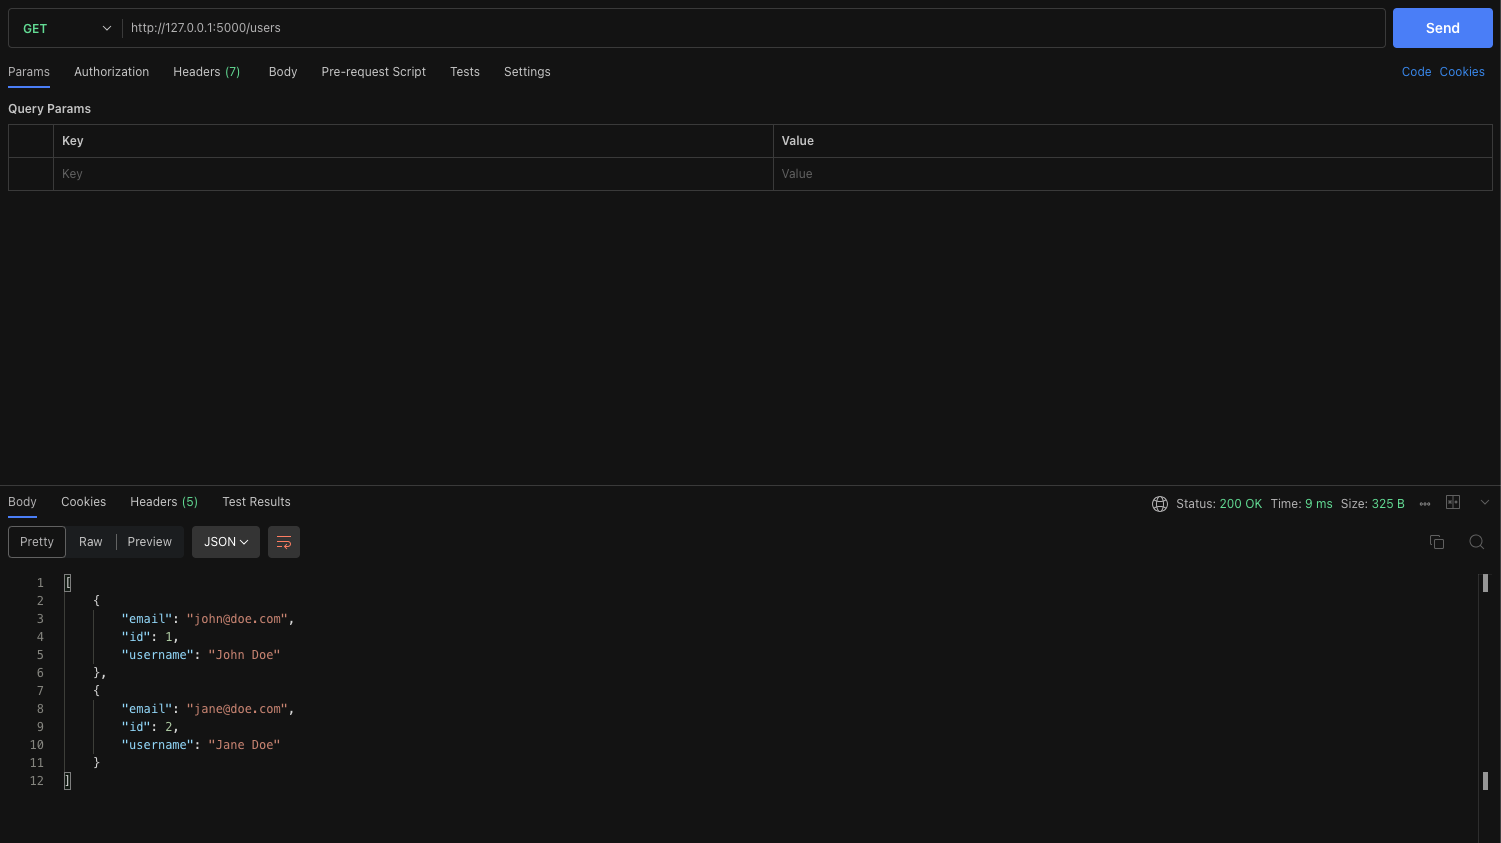
Run Manual Tests via Postman
It’s always a good idea to test your API manually and make sure it’s working.
You can of course go full TDD as well if you prefer.
Let’s use the VSCode-Postman extension.
Creating Users


Reading All Users

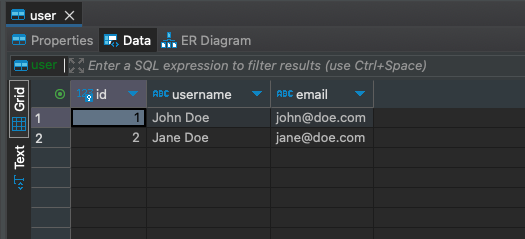
Great! our app works. Let’s double-check it with the database

How To Test The Flask App
Now comes the million-dollar question, how do you test the app?
Should you use a real Postgres DB? But isn’t this too much overhead?
Perhaps use SQLite but this has its drawbacks.
It’s not representative of using Postgres in the real world and you may not catch database errors.
Maybe you should mock the interaction?
Let’s look at all 3 ways to test this and how to make a decision.
Use a Real Test DB
This is by far my favorite way to test the app. In its natural setting.
You can change the DATABASE_URI to a test database and you’re done.
No mocks, no coupling, no implementation detail. Easy to test and easy to refactor.
Drawbacks include more resources, costs, and longer runtime. However, you can work to optimize test runtime.
I’ve only included 1 simple test, but you would have several to check various functionality.
user_manager/tests/test_user_manager.py1
2
3
4
5
6
7
8
9
10
11
12
13
14
15
16
17import json
def test_add_user(test_client, user_payload):
response = test_client.post(
"/users", data=json.dumps(user_payload), content_type="application/json"
)
assert response.status_code == 201
create_response_json = json.loads(response.data)
assert create_response_json == {"message": "User created"}
response = test_client.get("/users")
assert response.status_code == 200
read_response_json = json.loads(response.data)
print(read_response_json)
assert len(read_response_json) == 1
The test accepts a Test FlastAPI client and user_payload as fixtures.
It creates a user and checks that the user has been created. Simple.
Let’s see the conftest.py which holds the fixtures.
user_manager/tests/conftest.py1
2
3
4
5
6
7
8
9
10
11
12
13
14
15
16
17
18
19
20
21
22
23
24
25
26
27
28
29
30
31
32
33
34
35
36
37
38
39
40
41
42
43
44
45
46
47
48
49
50
51
52
53
54
55
56
57
58
59
60
61
62
63
64
65
66
67
68
69
70
71
72
73
74
75import pytest
import random
from sqlalchemy import create_engine
from sqlalchemy.exc import OperationalError as SQLAlchemyOperationalError
from sqlalchemy.pool import StaticPool
from user_manager.app import create_app
from user_manager.models import db
def pytest_addoption(parser):
parser.addoption(
"--dburl", # For Postgres use "postgresql://user:password@localhost/dbname"
action="store",
default="sqlite:///:memory:", # Default uses SQLite in-memory database
help="Database URL to use for tests.",
)
def db_url(request):
"""Fixture to retrieve the database URL."""
return request.config.getoption("--dburl")
def pytest_sessionstart(session):
db_url = session.config.getoption("--dburl")
try:
# Attempt to create an engine and connect to the database.
engine = create_engine(
db_url,
poolclass=StaticPool,
)
connection = engine.connect()
connection.close() # Close the connection right after a successful connect.
print("Using Database URL:", db_url)
print("Database connection successful.....")
except SQLAlchemyOperationalError as e:
print(f"Failed to connect to the database at {db_url}: {e}")
pytest.exit(
"Stopping tests because database connection could not be established."
)
def app(db_url):
"""Session-wide test 'app' fixture."""
test_config = {
"SQLALCHEMY_DATABASE_URI": db_url,
"SQLALCHEMY_TRACK_MODIFICATIONS": False,
}
app = create_app(test_config)
with app.app_context():
db.create_all()
yield app
# Close the database session and drop all tables after the session
db.session.remove()
db.drop_all()
def test_client(app):
"""Test client for the app."""
return app.test_client()
def user_payload():
suffix = random.randint(1, 100)
return {
"username": f"JohnDoe_{suffix}",
"email": f"john_{suffix}@doe.com",
}
Let’s break down what’s happening here.
- We use
pytest_addoptionto accept--dburlas a command line argument. If you’ve not usedaddoptsbefore, we’ve written a guide on how to use this and configure command-line arguments for Pytest. - Use the built-in request fixture to retrieve the argument.
- Use the
pytest_sessionstarthook to check that we can establish a connection to the db before proceeding, if not then exit. Of course, this logic only holds if you’re writing integration tests and you would not want your unit tests to fail due to this. - We have an
appfixture that passes thedburlto our Flask app, creates tables, and drops them at the end of each test. We could even add in some truncate logic as it adds time to create the tables repeatedly for 100s of tests. However, the goal is to have a clean slate or rollback after each test. - Flask test client that’s used in the tests.
user_payloadfixture that returns a new user.
While not perfect, this is a good start to make sure your tests NEVER use the production database as that would be a disaster.
Let’s run it.1
2cd user_manager
poetry run pytest tests/test_user_manager.py --dburl=postgresql://myuser:mypassword@localhost:5433/mydatabase_test -v -s

Note the first line of the tests (before collection) tells us which database we’re using. This is set up in the pytest_sessionstart fixture.
This is a great way to test your app, but it’s not without its drawbacks. Set up and teardown also need to be implemented correctly to avoid test contamination.
Use an in-memory database (SQLite)
The second option is to use an in-memory DB like SQLite or TinyDB (for document storage).
How to do this? Luckily for us, it’s one step. Don’t pass the --dburl value or pass an SQLite URL (which is the default).1
poetry run pytest tests/test_user_manager.py -v -s

Note the significantly lower execution time.
While this is great, if you’re planning to use Postgres or the database-specific functionality or methods, this won’t work for you which is a drawback.
Mocking Database Interactions
The last option and my least favourite is mocking.
Mocking is the act of creating a fake object that records calls and returns canned values, which arguably can replace the database-specific functionality allowing you to test your app without external dependencies.
Let’s see how to implement this.
user_manager/tests/mocking/conftest.py1
2
3
4
5
6
7
8
9
10
11
12
13
14
15
16
17
18
19
20
21
22
23
24
25
26
27
28
29
30
31import pytest
import random
from app import create_app
def app():
"""Session-wide test 'app' fixture."""
test_config = {
"TESTING": True,
"SQLALCHEMY_DATABASE_URI": "postgresql://postgres:postgres@localhost:5432/dummy_db", # Dummy database URL
"SQLALCHEMY_TRACK_MODIFICATIONS": False,
}
app = create_app(test_config)
with app.app_context():
yield app
def test_client(app):
"""Test client for the app."""
return app.test_client()
def user_payload():
suffix = random.randint(1, 100)
return {
"username": f"JohnDoe_{suffix}",
"email": f"john_{suffix}@doe.com"
}
The conftest.py is simpler and we’ve put in a fake Postgres URL just to keep SQLAlchemy happy.
The other 2 fixtures are the same.
Let’s see the test.
user_manager/tests/mocking/test_user_manager_mocked.py1
2
3
4
5
6
7
8
9
10
11
12
13
14
15
16
17
18
19
20
21
22
23
24
25
26
27
28
29
30
31
32
33
34
35
36
37
38
39
40
41
42
43
44import json
from models import User
def test_add_user(test_client, user_payload, mocker):
# Mock the add and commit operations
mock_session_add = mocker.patch("app.db.session.add", autospec=True)
mock_session_commit = mocker.patch(
"app.db.session.commit", autospec=True
)
# Simulate the POST request to add a user
response = test_client.post(
"/users", data=json.dumps(user_payload), content_type="application/json"
)
assert response.status_code == 201
create_response_json = json.loads(response.data)
assert create_response_json == {"message": "User created"}
# Ensure that the session operations were called correctly
mock_session_add.assert_called_once()
mock_session_commit.assert_called_once()
# Mock User.query to return a list containing a new User instance
mock_user_query = mocker.patch("app.User.query")
expected_user_object = User(
username=user_payload["username"], email=user_payload["email"]
)
mock_user_query.all.return_value = [expected_user_object]
# Simulate the GET request to fetch users
response = test_client.get("/users")
assert response.status_code == 200
read_response_json = json.loads(response.data)
# assert that query.all() was called
mock_user_query.all.assert_called_once()
assert read_response_json == [
{
"id": None, # ID is None because the User instance isn't saved to a real DB
"username": user_payload["username"],
"email": user_payload["email"],
}
]
Let’s understand what’s going on here.
- First, we create mock objects and patch the SQLAlchemy
addandcommitoperations. - We then create a new user with the API.
- We assert the response.
- We assert that the
addandcommitoperations were called. - We create a new mock object for
app.User.query. - We set the method’s return value (
query.all()) as the expected user object. - We do a GET request and assert the result and
query.allwas called.
Mocks
mock_session_add- This is a mock ofdb.session.add. It is used to ensure that no actual database operation occurs when adding a user.mock_session_commit- This is a mock ofdb.session.commit. It checks that the commit operation is called to finalize the database transaction.mock_user_query- This mock replacesUser.queryto control the behavior of database queries during the GET request. It is used to return predefined results without accessing a real database.
Patches
mocker.patch("app.db.session.add", autospec=True)- This patch is applied to thedb.session.addmethod.mocker.patch("app.db.session.commit", autospec=True)- This patch is applied to thedb.session.commitmethod.mocker.patch("app.User.query")- This patch replaces theUser.queryobject and mocks thequery.all()method.
Running this test,1
poetry run pytest tests/mocking/test_user_manager_mocked.py -v -s

Note — comment out the other conftest.py as the pytest_sessionstart hook may interfere with your mocking results.
While this works, can you see how complex it has become?
Several mocks, and patches, are deeply coupled with implementation detail.
For example, if you decide to replace SQLAlchemy with another ORM, say SQLModel, it will completely break your tests.
Any change in the names or structure of methods, arguments, etc. makes the tests vulnerable to breakage.
This is a single test, just imagine if you had 1000.
Mocks can also make refactors more difficult, so use them wisely.
Choosing the Right Testing Approach
When testing a Flask application that uses SQLAlchemy and PostgreSQL, you have several options.
Each has its pros and cons depending on the scale of your application, the complexity of the database operations, and the accuracy you require in your testing environments.
Let’s explore 3 key approaches:
- using a real test database (e.g., PostgreSQL with Docker)
- an in-memory database (e.g., SQLite)
- mocking database interactions.
Test Database
Pros:
- Realism: By using a real instance of your production database, you test the application under conditions that closely mimic the live environment. This includes actual database performance characteristics and transaction handling.
- Accuracy: This method allows you to catch issues that might only appear under real database conditions, such as specific constraints, indexes, and triggers that are not always perfectly emulated in an in-memory database.
Cons:
- Setup Complexity: Requires setting up a separate database instance, which can be time-consuming and may require additional resources (like Docker).
- Slower Tests: Interacting with a real database can significantly slow down test execution, especially as the size of the test suite grows.
In-Memory Database (SQLite)
Pros:
- Speed: In-memory databases are typically faster than disk-based databases because they don’t involve disk I/O. This can greatly speed up the execution of the test suite.
- Simplicity: Using SQLite in-memory mode is straightforward and doesn’t require much setup, making it an excellent choice for continuous integration environments.
Cons:
- Compatibility Issues: SQLite might not support all the features of PostgreSQL, which could lead to false positives or negatives in testing. For example, differences in SQL syntax, lack of certain data types, or missing advanced features like partial indexes.
- Less Realistic: It doesn’t replicate the exact behavior of your production environment, which might lead to surprises when deploying.
- Data Persistence: Since SQLite is an in-memory database, data is not persisted between test runs. This can be a problem if you need to inspect the database state after a test failure.
Mocking
Pros:
- Isolation: Mocking allows you to isolate tests from external systems, ensuring that tests are not affected by the state of a database. It’s useful for testing logic that is independent of database interactions.
- Control: It gives you complete control over the database responses, enabling you to easily simulate various edge cases, such as database errors or unusual data conditions.
Cons:
- Complexity: Setting up mocks can be complex and error-prone, especially when simulating more complex queries or database interactions.
- Maintenance Overhead: Mocks need to be updated to reflect any changes in the database schema or ORM layer, which can increase maintenance overhead.
- Lack of Realism: Since you’re not interacting with a real database, you might miss issues that would otherwise affect a production environment.
Making the Choice
The choice between these testing strategies depends largely on your specific requirements:
- Development Phase: During initial development, using an in-memory database like SQLite can speed up the cycle of testing changes rapidly. For smaller projects or projects at an early stage, this might suffice.
- CI/CD Pipeline: In continuous integration environments, you might opt for a combination of SQLite for most tests to keep the pipeline fast, and a real PostgreSQL instance for a smaller set of integration tests that cover critical functionalities.
- Pre-Release Testing: Before a release, testing against a real PostgreSQL instance (using Docker or a similar tool) ensures that the application behaves as expected in production.
In conclusion, if you are working on a large project or one that heavily relies on specific database features, consider investing in testing with a real PostgreSQL database.
For most other cases, especially during early development stages, an in-memory database or even mocking (for specific unit tests) can be sufficient.
Conclusion
That wraps up our deep dive into the three pivotal strategies for testing your Flask-SQLAlchemy application.
In this article, we’ve explored 3 different ways to test your Flask app, using PostgreSQL, SQLite, and mock interactions.
You’ve gained valuable insights into setting up a realistic testing environment using Docker and PostgreSQL to mirror production conditions closely.
For faster, more iterative testing cycles, we looked at how an in-memory SQLite database could streamline your workflow.
Lastly, we also explored and learned how to mock database interactions.
By now, you should feel well-equipped to make informed decisions about which testing strategy best suits your project’s needs.
As you move forward, I encourage you to experiment with these approaches, but keep in mind, there is no one-size-fits-all solution. The best approach will depend on your project’s requirements, scale, and complexity.
If you have questions, suggestions, or topics you’d like me to cover in future articles, feel free to reach out via Twitter, GitHub, or Email.
Until next time, happy testing, and may your code always perform as intended! Cheers! 🚀
Additional Reading
Example Code Used in This Article
How To Run Pytest With Poetry (A Step-by-Step Guide)
13 Proven Ways To Improve Test Runtime With Pytest
How To Use Pytest With Command Line Options (Easy To Follow Guide)
How To Access Test Details With Pytest Request Fixture
How To Test Database Transactions With Pytest And SQLModel
Pytest API Testing with FastAPI, SQLAlchemy, Postgres - Part 1 and Part 2
Comprehensive Step-by-Step Guide to Testing Django REST APIs with Pytest
Delightful testing with pytest and Flask-SQLAlchemy
Transactional Testing with Pytest and Flask-SQLAlchemy
Surrender Python Mocking! I Have You Now