Comprehensive Step-by-Step Guide to Testing Django REST APIs with Pytest
There are several frameworks for building robust and scalable Rest APIs with Python.
FastAPI, Flask and Django are the most popular, reliable and easy to use.
However, building APIs is incomplete without thorough testing.
Unit tests and Integration tests are necessary to ensure your API works for client use cases.
Most of these frameworks come with inbuilt Unittest integration, but writing and maintaining test classes can be cumbersome.
Test discovery, extensibility and assertions are simpler with Pytest.
Pytest provides an easy and efficient way to write tests for Django APIs and applications using inbuilt fixtures, plugins and auto-discovery.
In this article, you’ll learn how to use Pytest to test a Django CRUD REST API. CRUD stands for Create, Read, Update, Delete. An important design pattern of most REST Services.
We’ll cover setting up test cases, making HTTP requests to the API, validating responses/error codes, and handling and mocking external dependencies.
We will also discuss best practices for organizing tests, using fixtures for test data setup, and interpreting test results.
Let’s get started then?
Demo Video - Testing a Python Django REST API with Pytest and Postman
About Django And The Rest Framework
Django was developed in 2003 by a web development team at the Lawrence Journal-World, a newspaper in Lawrence, Kansas, USA.
Led by Adrian Holovaty and Simon Willison, the framework was created as a tool to build web applications quickly and efficiently.
Originally developed to help the newspaper’s developers create content management systems (CMS) and news-related applications, Django was open-sourced and gained significant popularity and become one of the most widely used web frameworks in Python.
Django follows the Model-View-Template (MVT) architectural pattern, which emphasizes the separation of concerns and promotes code reusability.
Django’s REST API framework (DRF) extends Django’s capabilities to build APIs quickly and efficiently.
DRF offers various features, such as authentication and permissions, serialization, validation, pagination, and more, which are essential for building production-ready APIs.
It also supports different serialization formats, including JSON, XML, and others, making it flexible for clients with diverse needs.
DRF’s modular architecture allows developers to easily customize and extend its functionalities, making it highly adaptable to different project requirements.
It also integrates seamlessly with Django’s authentication and authorization system, providing robust security features for API endpoints.
Overall, Django’s powerful REST API framework provides a powerful and flexible solution for builidng robust and performant REST APIs.
Objectives
By the end of this tutorial you should be able to:
- Have a basic understanding of the Django REST API framework (DRF)
- Understand how to use Django models and views.
- Modify the Django boilerplate and create a simple CRUD (Create, Read, Update, Delete) REST API
- Write tests for Create, Update and Delete operations using Pytest and Fixtures.
- Build a simple well-tested Task Management API using Django
- Generate Swagger documentation for your REST API.
Prerequisites
To easily follow along and achieve the above objectives, I’d recommend the following as a basic requirement
- Basic knowledge of the Python programming language
- Basic understanding of REST API and CRUD architecture
- Beginner-level knowledge of using Pytest and Fixtures.
Assuming you’re all good with the above, let’s dig in…
What We’re Building?
In this tutorial, we’ll build a simple Task Management REST API that can
- Create a new task
- Read a task
- Read all tasks
- Update a task
- Delete a task
CRUD APIs are a foundational tool in your web application as they allow you to manage the lifecycle of any object. To keep things simple, we’ll be using the inbuilt SQLite database.
Getting Started
To get started, clone the repo here or you can create your own repo by creating a folder and running git init to initialise it.1
2mkdir <DIR_NAME>
cd <DIR_NAME>
In this project, we’ll be using Python 3.10.10.
Create a virtual environment and install the requirements (packages) using1
pip install -r requirements.txt
While all libraries are necessary, a couple of important ones here.
djangodjangorestframework
Now let’s set up the Django boilerplate. All commands to be run from the root of your repo.
Set Up Django
Run the command below to create the project1
django-admin startproject tasks .
Now let’s activate the database migrations of the built-in user model.1
python manage.py migrate
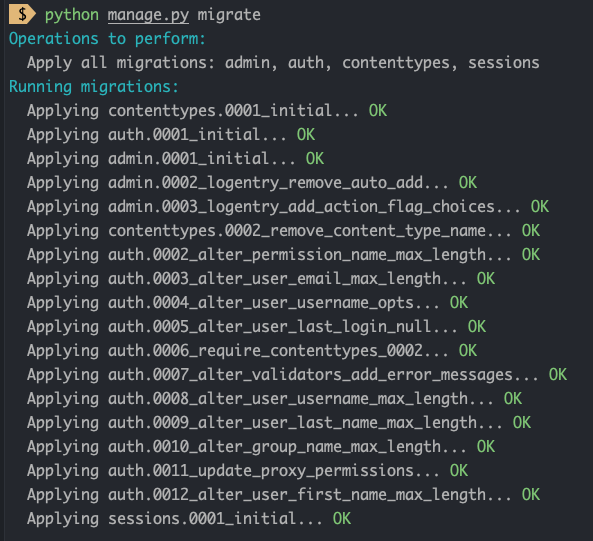
It’s time to start the dev server to make sure it all works out of the box.1
python manage.py runserver
Once you hit enter you should see a message that a web server has started on http://127.0.0.1:8000/ and visiting this page in your browser should present you with the welcome page.
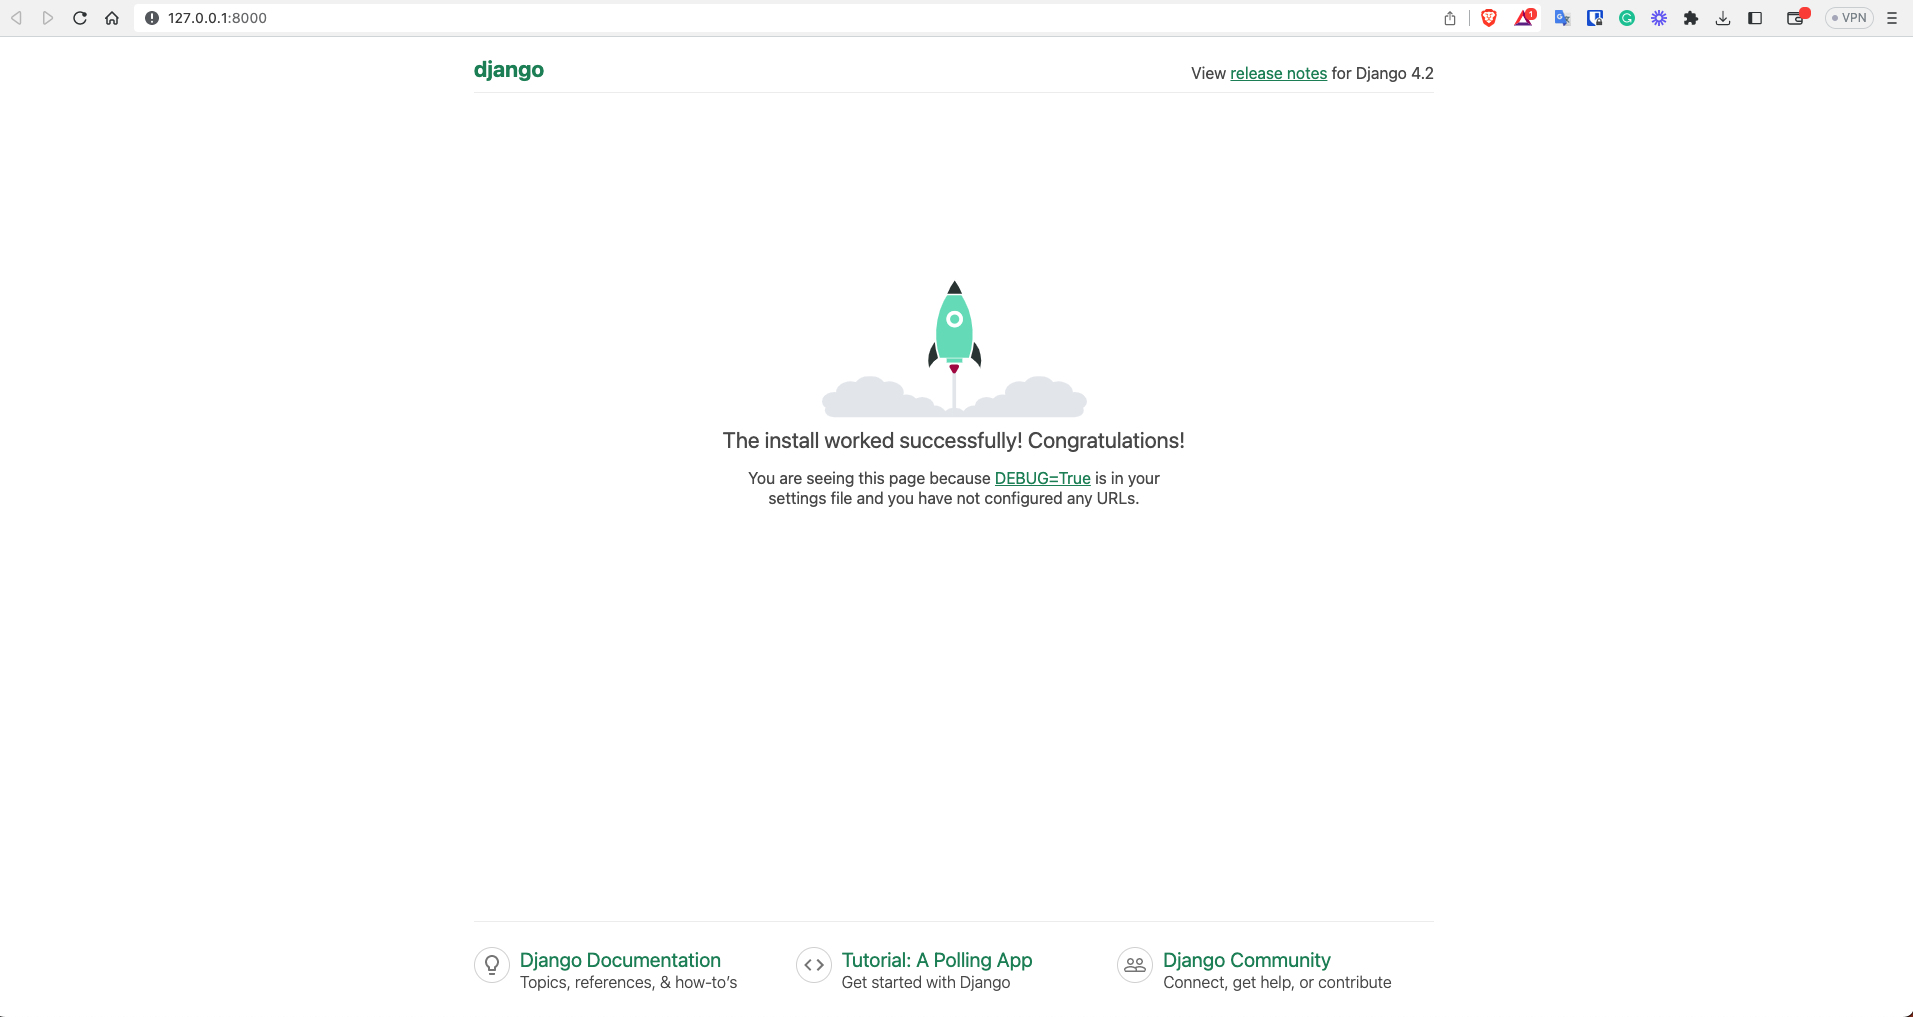
Now that we have a Django project (tasks) let’s create our app task_api that handles requests made to the /api/tasks endpoint.1
django-admin startapp task_api
This will create a task_api folder containing various files like
admin.pyserializers.pymodels.pyapps.pyurls.pyviews.py
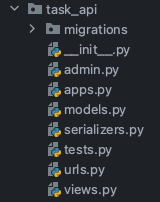
These are important, and we’ll come to them in a minute.
For now, the last step in this sequence is to modify the tasks/settings.py file and add the Django REST framework and our task_api app.
tasks/settings.py1
2
3
4
5
6
7
8
9
10INSTALLED_APPS = [
'django.contrib.admin',
'django.contrib.auth',
'django.contrib.contenttypes',
'django.contrib.sessions',
'django.contrib.messages',
'django.contrib.staticfiles',
'task_api',
'rest_framework'
]
That’s most of the boilerplate code done. Now let’s look at creating the models for the database and API.
Create Django Models
Now there are 2 models we need to create.
- Database model — Tell the database what columns to store, in what data format and any constraints or relationships.
- Serializer model — For the REST API framework to convert data to a serialized JSON format that can be sent over the web.
Database Model
In Django, a database model refers to a Python class that defines the structure of a database table.
It is used to define the fields or columns of the table, their data types, and any constraints or relationships between tables.
Django uses an object-relational mapping (ORM) approach, where Python classes are used to define database models, and Django automatically creates the database tables based on these models.
task_api/models.py1
2
3
4
5
6
7
8
9
10
11
12
13
14
15
16import uuid
from django.db import models
class TaskModel(models.Model):
objects = None
id = models.UUIDField(primary_key=True, default=uuid.uuid4, editable=False)
title = models.CharField(max_length=255, unique=True)
content = models.TextField()
createdAt = models.DateTimeField(auto_now_add=True)
updatedAt = models.DateTimeField(auto_now_add=True)
class Meta:
db_table = "tasks"
ordering = ["createdAt"]
constraints = [models.UniqueConstraint(fields=["title"], name="unique_title")]
The above model contains the following schema.
id— Unique ID for the task. W use theUUIDclass to generate random UUID strings as a primary key which is safer than using incremental integerstitle— Title of the task. Fixed length (max 255 chars)content— Body or description of the task. No fixed lengthcreatedAt— Timestamp at which the task was createdupdatedAt— Timestamp at which the task was updated
Below that we have the Meta Model where we define important properties and constraints. For e.g.
- Name our table
tasks - Order the data by
createdAttimestamp - Constraint - All tasks must have a unique
title
Now that we have our database model let’s define the serializer model.
Serializer Model
In Django, a serializer is a component of Django’s built-in serialization framework that provides a way to convert complex data types, such as Django model instances, into JSON, XML, or other formats that can be easily rendered into HTTP responses.
It also provides deserialization, which allows for parsed data to be converted back into complex types, after first validating the incoming data.
task_api/serializers.py1
2
3
4
5
6
7
8from rest_framework import serializers
from task_api.models import TaskModel
class TaskSerializer(serializers.ModelSerializer):
class Meta:
model = TaskModel
fields = "__all__"
Here we serialize the TaskModel that we defined in the previous step.
Create Django Views
In Django, views are functions that handle HTTP requests and return HTTP responses.
They are responsible for processing incoming requests, interacting with models and databases, performing business logic, and generating responses that are sent back to the client.
Views can be configured to handle different HTTP methods, such as GET, POST, PUT, DELETE, etc., and can be associated with URLs using URL patterns.
Django uses URL routing to map incoming URLs to corresponding views, allowing you to define how different URLs should be handled by different views in your application.
Types Of Views
There are several types of views in Django. Here are some of the most popular that are worth knowing about.
- Function-based views: These are the simplest type of views and are implemented as Python functions. They receive a request from a client, process it, and return an HTTP response.
- Class-based views: These views are implemented as Python classes and provide a more object-oriented approach to handling HTTP requests. They offer more flexibility and reusability compared to function-based views.
- Generic views: Django provides a set of pre-built generic views that can be used as base views for common use cases, such as displaying lists of objects, displaying detailed views of objects, handling form submissions, etc.
- Class-based views with mixins: They provide reusable code for common tasks such as authentication, permissions, caching, etc., and can be combined with class-based views to create custom views that meet specific requirements.
- Django’s built-in views: Django provides several built-in views for handling common tasks such as authentication, form handling, redirects, etc. These views are available in Django’s views module and can be used directly in your Django project.
In this example, we’ll make use of the inbuilt Generic Views Class to route the incoming request to the appropriate view.
We’ll split our views into 2 main classes.
Tasks— To manage — Create 1 Task and Get All TasksTaskDetail— To manage — Get 1 Task, Update 1 Task, Delete 1 Task
These classes will contain the function views defining the logic.
Create Task / Get All Tasks Views
Let’s first take a look at the Tasks Class View.1
2
3
4
5
6
7
8
9
10
11
12
13
14
15
16
17
18
19
20
21
22
23
24
25
26
27
28
29
30
31
32
33
34
35
36
37
38
39
40
41
42
43
44
45
46
47from django.shortcuts import render
from rest_framework.response import Response
from rest_framework import status, generics
from task_api.models import TaskModel
from task_api.serializers import TaskSerializer
import math
from datetime import datetime
class Tasks(generics.GenericAPIView):
serializer_class = TaskSerializer
queryset = TaskModel.objects.all()
def get(self, request):
page_num = int(request.GET.get("page", 1))
limit_num = int(request.GET.get("limit", 10))
start_num = (page_num - 1) * limit_num
end_num = limit_num * page_num
search_param = request.GET.get("search")
tasks = TaskModel.objects.all()
total_tasks = tasks.count()
if search_param:
tasks = tasks.filter(title__icontains=search_param)
serializer = self.serializer_class(tasks[start_num:end_num], many=True)
return Response(
{
"status": "success",
"total": total_tasks,
"page": page_num,
"last_page": math.ceil(total_tasks / limit_num),
"tasks": serializer.data,
}
)
def post(self, request):
serializer = self.serializer_class(data=request.data)
if serializer.is_valid():
serializer.save()
return Response(
{"status": "success", "task": serializer.data},
status=status.HTTP_201_CREATED,
)
else:
return Response(
{"status": "fail", "message": serializer.errors},
status=status.HTTP_400_BAD_REQUEST,
)
In the above view class, we have 2 view methods — get and post .
get()– The get() handler will return a paginated list of records to the client. By default, the handler will only return the first 10 records to the client if the limit and page parameters are absent in the request URL. The client can pass thepageandlimitparameters to change the pagination.post()– The post() handler will add the new record to the database when a POST request hits the server at/api/tasks. It auto-creates the ID and timestamps so the client only needs to specify thetitleandcontent.
We’ll take a look at the payload to send via Postman and Pytest later in the article.
Get Task / Patch Task / Delete Task Views
Our TaskDetail View class handles these view functions1
2
3
4
5
6
7
8
9
10
11
12
13
14
15
16
17
18
19
20
21
22
23
24
25
26
27
28
29
30
31
32
33
34
35
36
37
38
39
40
41
42
43
44
45
46
47
48
49class TaskDetail(generics.GenericAPIView):
queryset = TaskModel.objects.all()
serializer_class = TaskSerializer
def get_task(self, pk):
try:
return TaskModel.objects.get(pk=pk)
except:
return None
def get(self, request, pk):
task = self.get_task(pk=pk)
if task is None:
return Response(
{"status": "fail", "message": f"Task with Id: {pk} not found"},
status=status.HTTP_404_NOT_FOUND,
)
serializer = self.serializer_class(task)
return Response({"status": "success", "task": serializer.data})
def patch(self, request, pk):
task = self.get_task(pk)
if task is None:
return Response(
{"status": "fail", "message": f"Task with Id: {pk} not found"},
status=status.HTTP_404_NOT_FOUND,
)
serializer = self.serializer_class(task, data=request.data, partial=True)
if serializer.is_valid():
serializer.validated_data["updatedAt"] = datetime.now()
serializer.save()
return Response({"status": "success", "task": serializer.data})
return Response(
{"status": "fail", "message": serializer.errors},
status=status.HTTP_400_BAD_REQUEST,
)
def delete(self, request, pk):
task = self.get_task(pk)
if task is None:
return Response(
{"status": "fail", "message": f"Task with Id: {pk} not found"},
status=status.HTTP_404_NOT_FOUND,
)
task.delete()
return Response(status=status.HTTP_204_NO_CONTENT)
In the above view class, we have 3 view methods — get , patch and delete
get()– The get() handler will return an individual task based on the PRIMARY KEY (pk) specified in the GET request.patch()– The patch() handler will update the record in the database for thatpkbased on new content from the payload. Note- you only need to specify the field you want to update and you cannot update the ID or timestamp fields. Bad requests return a400_BAD_REQUESTerror while tasks not found return a404_NOT_FOUND.delete()— The delete() handler will delete the record in the database for thatpkif it exists. If it doesn’t exist, it will return a404_NOT_FOUNDHTTP error response code.
As you can see above HTTP error response codes are extremely important to help your client understand whether their request produces a successful response, a client error, server error, auth error and so on.
It’s very important to use correct error codes as an API developer and it’s part of good design principles.
Add CRUD Routes & URLs
When a request comes to our API, it’s first checked by the tasks/urls.py file which decides which view should be called to process the request.
Let’s add these to our 2 files.
task_api/urls.py1
2
3
4
5from django.urls import path
from task_api.views import Tasks, TaskDetail
urlpatterns = [path("", Tasks.as_view()),
path("<str:pk>", TaskDetail.as_view())]
This allows us to access requests into views and pass the pk string as a string parameter.
Now we define the base URL for our API under tasks/urls.py
tasks/urls.py1
2
3
4
5
6
7
8
9
10
11
12
13
14
15
16
17
18
19
20
21
22
23from django.contrib import admin
from django.urls import path, include, re_path
from rest_framework import permissions
from drf_yasg.views import get_schema_view
from drf_yasg import openapi
schema_view = get_schema_view(
openapi.Info(
title="Tasks API",
default_version="v1",
description="Task API built by Eric Sales De Andrade",
terms_of_service="https://www.google.com/policies/terms/",
contact=openapi.Contact(email="contact@snippets.local"),
license=openapi.License(name="BSD License"),
),
public=True,
permission_classes=[permissions.AllowAny],
)
urlpatterns = [
path("admin/", admin.site.urls),
path("api/tasks/", include("task_api.urls"))
]
If you note the urlpatterns parameter, we specify the admin and API path. We also pass theinclude parameter to tell Django to call the other urls.py file which points to the views.
Setup CORS in Django
Cross-Origin Resource Sharing (CORS) is a security feature implemented in web browsers that restricts web pages from making requests to a different domain than the one that served the web page.
To set up CORS in Django,
Step 1: Install Django-cors-headers
You can install the django-cors-headers package using pip.
Run the following command to install it:1
pip install django-cors-headers
This is also included in our requirements.txt file.
Step 2: Add ‘corsheaders’ to INSTALLED_APPS.
In your Django project’s settings.py file, add ‘corsheaders’ to the INSTALLED_APPS list:
tasks/settings.py1
2
3
4
5INSTALLED_APPS = [
...
'corsheaders',
...
]
Step 3: Add MIDDLEWARE_CLASSES
Add the following middleware classes to your Django project’s settings.py file:
tasks/settings.py1
2
3
4
5
6MIDDLEWARE = [
# ...
'corsheaders.middleware.CorsMiddleware',
'django.middleware.common.CommonMiddleware',
# ...
]
Step 4: Configure CORS settings
Add the following CORS settings to your Django project’s settings.py file:
tasks/settings.py1
2CORS_ALLOWED_ORIGINS = ["http://localhost:3000"]
CORS_ALLOW_CREDENTIALS = True
With these steps, you should be able to set up CORS in your Django application and allow cross-origin requests from specified domains
Create the Migration File and Start the Server
Phew that’s a lot of steps. We’re almost there.
Let’s create the migrations (to help Django create the database tables) and run the server.
Create migrations1
python manage.py makemigrations
Push migrations to db1
python manage.py migrate
Run Server1
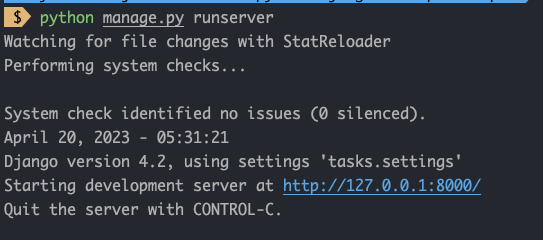
python manage.py runserver
Assuming you’ve correctly done all the steps above, you should see this
Testing API via Postman
Now the moment of truth. Time to test our API via Postman.
Create Task
We can create a task by sending a POST request to the http://localhost:8000/api/tasks endpoint.
Note this may be different if you’re using a different PORT, but you can see what port the process is running from the previous step.
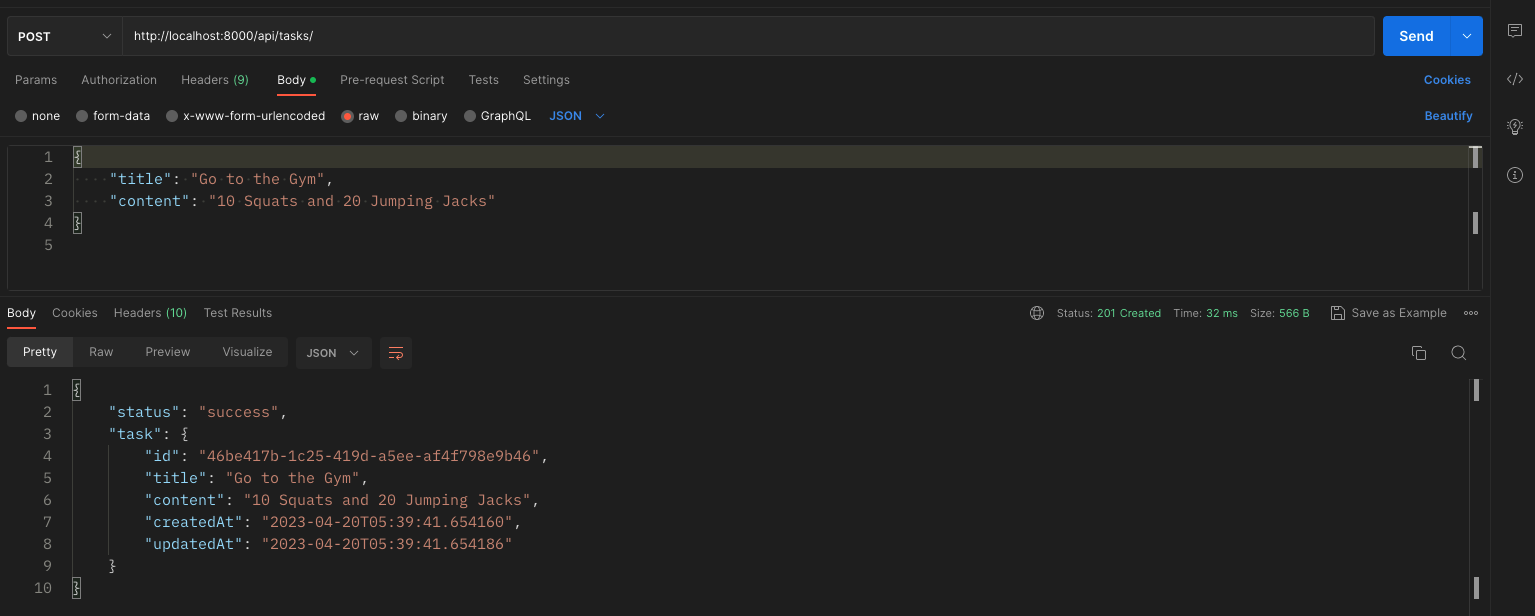
We can see that the task was successfully created.
Let’s create a 2nd task just so that we have more than 1 record when doing get tasks
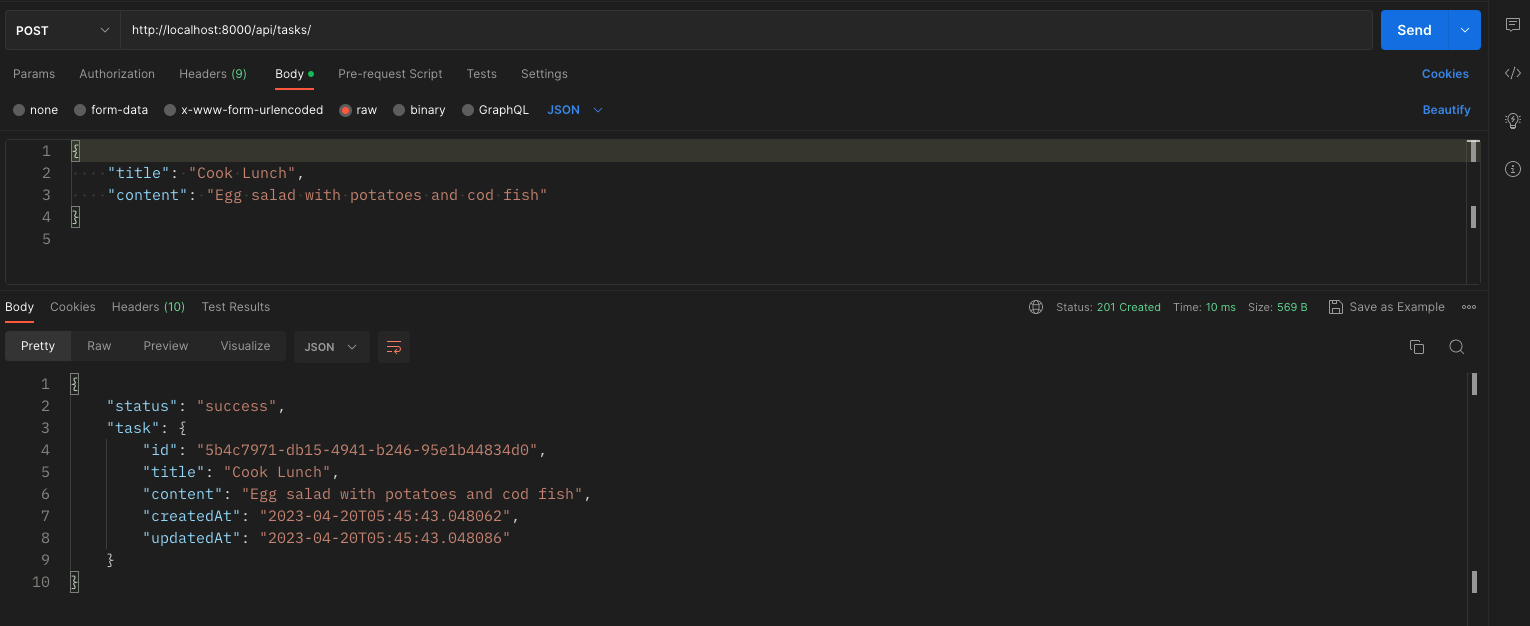
Get Task/s
Let’s get ALL tasks by making a GET request to the http://localhost:8000/api/tasks endpoint
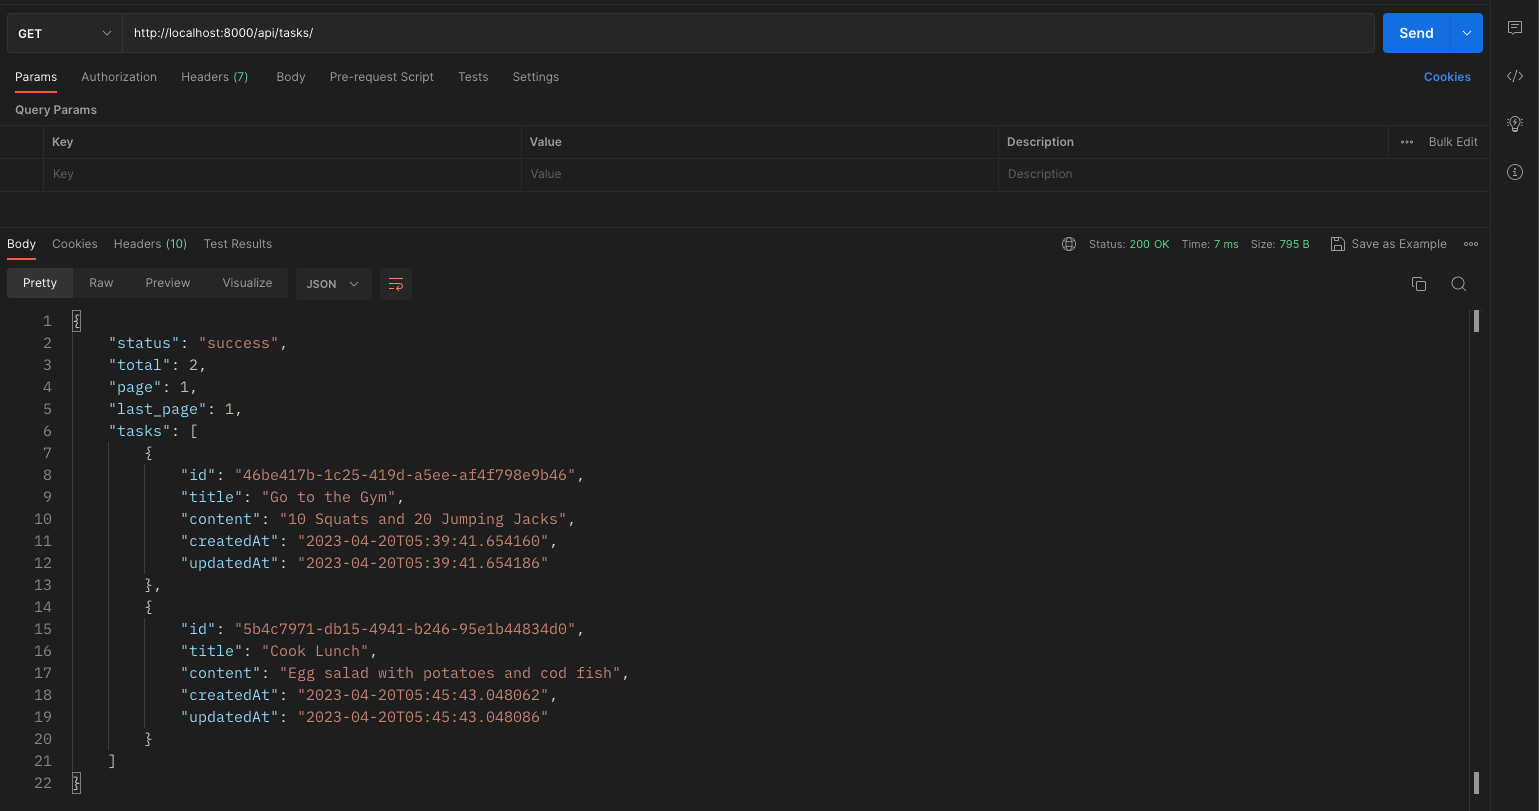
Here we have the 2 tasks created from the previous step.
We can also get an individual task by passing the id as a GET request string parameter
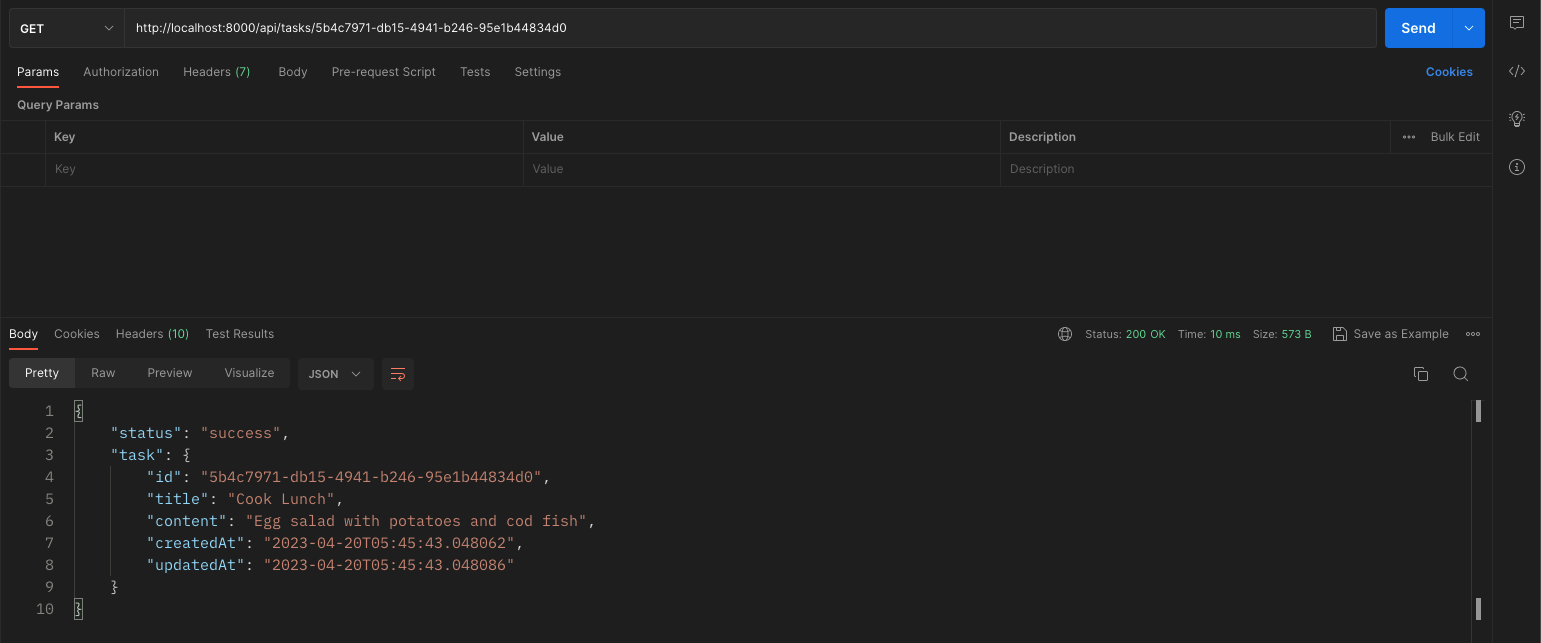
Here you can see we’ve passed an id in the URL.
Update Task
Let’s change the title of one of our tasks.
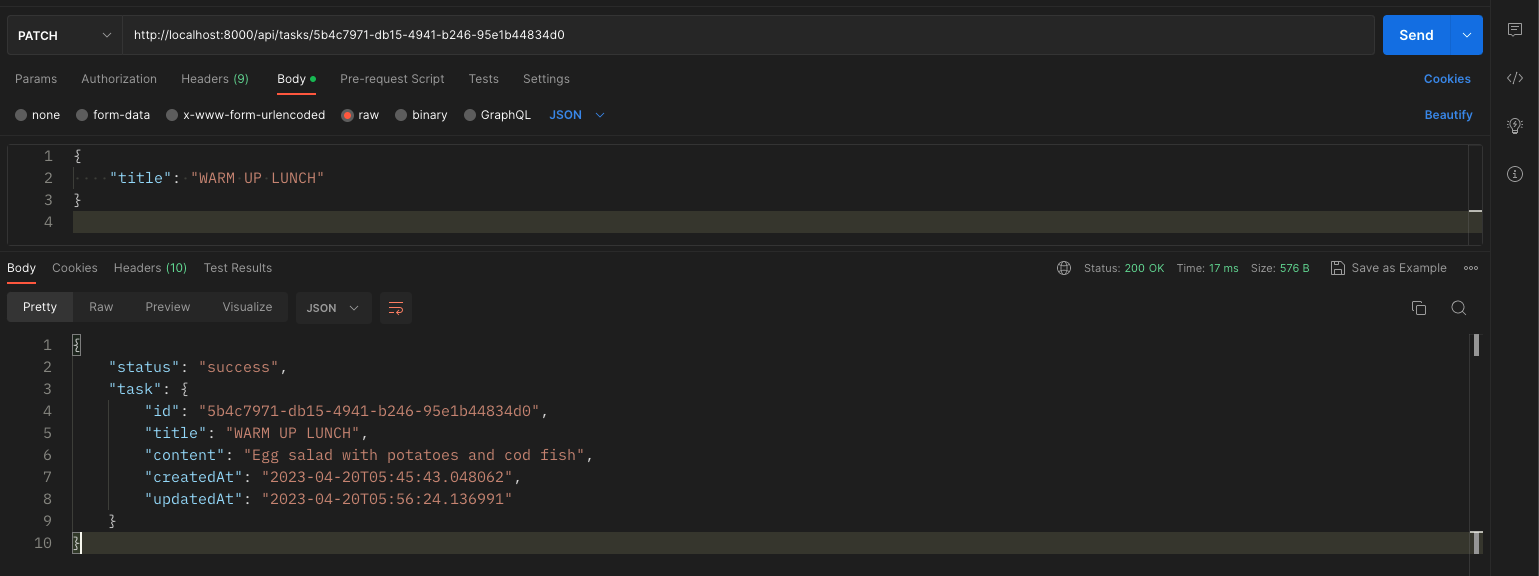
Here we send a PATCH request with a new payload (title in this case) and can easily update the record.
Note the change to the updatedAt timestamp.
And if the task doesn’t exist or our key is incorrect, we get a nice user-friendly message with a 404 Status Code.

Delete Task
The last step in our operation is to delete a task.
Let’s run GET tasks to get the keys and delete our Gym Task

As you can see it doesn’t return anything but we can a 204 status code which indicates a successful operation.
You can cross-check this by getting ALL tasks again. The Gym task no longer exists.
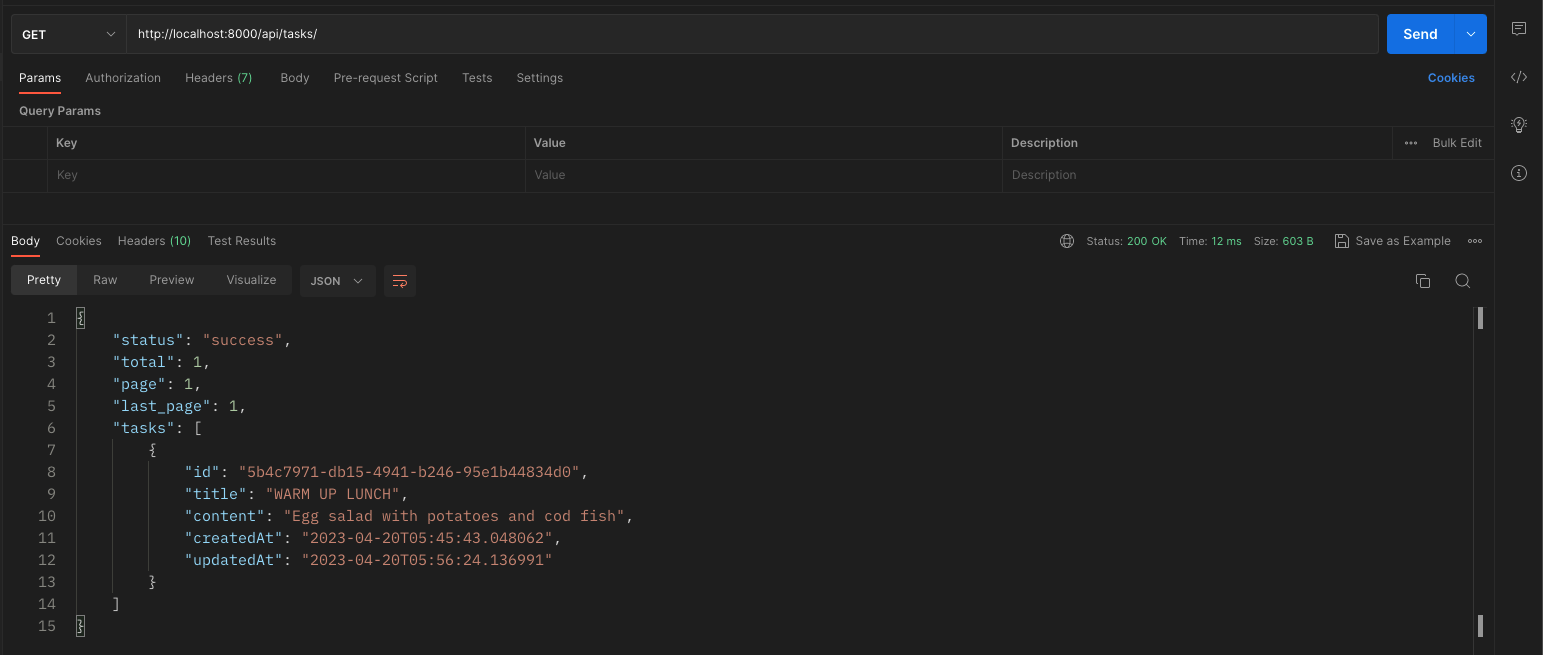
You can stop your Django Server by pressing Control+C.
Unit Tests using Pytest Django
Awesome!
Now that you have the API server running and tested let’s write some Unit Tests.
This is probably the reason why you came here in the first place.
There are several ways to test the Django REST Framework.
- APIRequestFactory
- APIClient
- RequestsClient
- CoreAPIClient
You can very well test it using the popular Requests Library but in this case, we’ll use the native APIClient library.
The beautiful bit is this will use a Pytest fixture that sets up and tears down the database after each test session, ensuring test isolation and statelessness.
If you’re unfamiliar with fixtures, here’s a simple guide.
Let’s define it in our conftest.py file.
Read more about conftest.py here.
Conftest and Setup
conftest.py1
2
3
4
5
6
7
8
9
10
11
12import pytest
from rest_framework.test import APIClient
def api_client() -> APIClient:
"""
Fixture to provide an API client
:return: APIClient
"""
yield APIClient()
Now this fixture will be imported and used across our tests.
As we said before, the database will be started up and torn down after each test.
Meaning we have to create data for each case, which is not a problem and more efficient solutions can indeed be found.
Create Task
test_task_api.py1
2
3
4
5
6
7
8
9
10
11
12
13
14
15
16
17
18
19
20
21
22
23
24
25
26
def test_create_task(api_client) -> None:
"""
Test the create task API
:param api_client:
:return: None
"""
payload = {
"title": "Wash Clothes",
"content": "Wash clothes in the washing machine",
}
# Create a task
response_create = api_client.post("/api/tasks/", data=payload, format="json")
task_id = response_create.data["task"]["id"]
logger.info(f"Created task with id: {task_id}")
logger.info(f"Response: {response_create.data}")
assert response_create.status_code == 201
assert response_create.data["task"]["title"] == payload["title"]
# Read the task
response_read = api_client.get(f"/api/tasks/{task_id}", format="json")
logger.info(f"Read task with id: {task_id}")
logger.info(f"Response: {response_read.data}")
assert response_read.status_code == 200
assert response_read.data["task"]["title"] == payload["title"]
The above test contains the @pytest.mark.django_db marker.
As per official docs,
This is used to mark a test function as requiring the database. It will ensure the database is set up correctly for the test. Each test will run in its own transaction which will be rolled back at the end of the test.
We also pass the api_client fixture defined in our conftest.py file.
You can set autouse=True which will auto-import the fixture but let’s keep this manually controlled for now.
This test creates a task (Title — “Wash Clothes”), reads its status code and the data returned by the POST request.
We then do a GET task request to get our task (based on the unique ID) and assert that our task does truly exist in the DB.
It’s important to read from database after you write (to ensure the record is created) but this is different when using a multi-node cluster (single/multi-leader) which makes use of principles such as eventual consistency.
As we’ll be testing the GET task in every operation, let’s move onto the Update Task.
Update Task
test_task_api.py1
2
3
4
5
6
7
8
9
10
11
12
13
14
15
16
17
18
19
20
21
22
23
24
25
26
27
28
29
30
31
32
33
34
35
36
37
def test_patch_task(api_client) -> None:
"""
Test the update task API
:param api_client:
:return: None
"""
payload = {
"title": "Trim the Lawn",
"content": "Trim the lawn with the lawnmower",
}
# Create a task
response_create = api_client.post("/api/tasks/", data=payload, format="json")
task_id = response_create.data["task"]["id"]
logger.info(f"Created task with id: {task_id}")
logger.info(f"Response: {response_create.data}")
assert response_create.status_code == 201
assert response_create.data["task"]["title"] == payload["title"]
# Update the task
payload["title"] = "Cut the grass"
response_update = api_client.patch(
f"/api/tasks/{task_id}", data=payload, format="json"
)
logger.info(f"Updated task with id: {task_id}")
logger.info(f"Response: {response_update.data}")
assert response_update.status_code == 200
assert response_update.data["task"]["title"] == payload["title"]
# Task doesn't exist
response_update = api_client.patch(
f"/api/tasks/{task_id + '1'}", data=payload, format="json"
)
logger.info(f"Updated task with id: {task_id + '1'}")
logger.info(f"Response: {response_update.data}")
assert response_update.status_code == 404
Similar to the previous test, we create a task, update it and read the updated values.
You can assert status codes, and titles (given the constraint all titles have to be unique).
Lastly, we also check that the correct status codes are returned if the task doesn’t exist.
Delete Task
The last test in our test suite is the Delete Task.
test_task_api.py1
2
3
4
5
6
7
8
9
10
11
12
13
14
15
16
17
18
19
20
21
22
23
24
25
26
27
28
29
30
31
def test_delete_task(api_client) -> None:
"""
Test the delete task API
:param api_client:
:return: None
"""
payload = {
"title": "Cook healthy food",
"content": "Cook healthy food for the family with high protein and low fat",
}
# Create a task
response_create = api_client.post("/api/tasks/", data=payload, format="json")
task_id = response_create.data["task"]["id"]
logger.info(f"Created task with id: {task_id}")
logger.info(f"Response: {response_create.data}")
assert response_create.status_code == 201
assert response_create.data["task"]["title"] == payload["title"]
# Delete the task
response_delete = api_client.delete(f"/api/tasks/{task_id}", format="json")
assert response_delete.status_code == 204
# Read the task
response_read = api_client.get(f"/api/tasks/{task_id}", format="json")
assert response_read.status_code == 404
# Task doesn't exist
response_delete = api_client.delete(f"/api/tasks/{task_id + '1'}", format="json")
assert response_delete.status_code == 404
In this test we create a task, Delete it and read it to make sure it doesn’t exist.
We also try to delete a task that’s non-existent in the first place and assert we get an expected 404 HTTP status code.
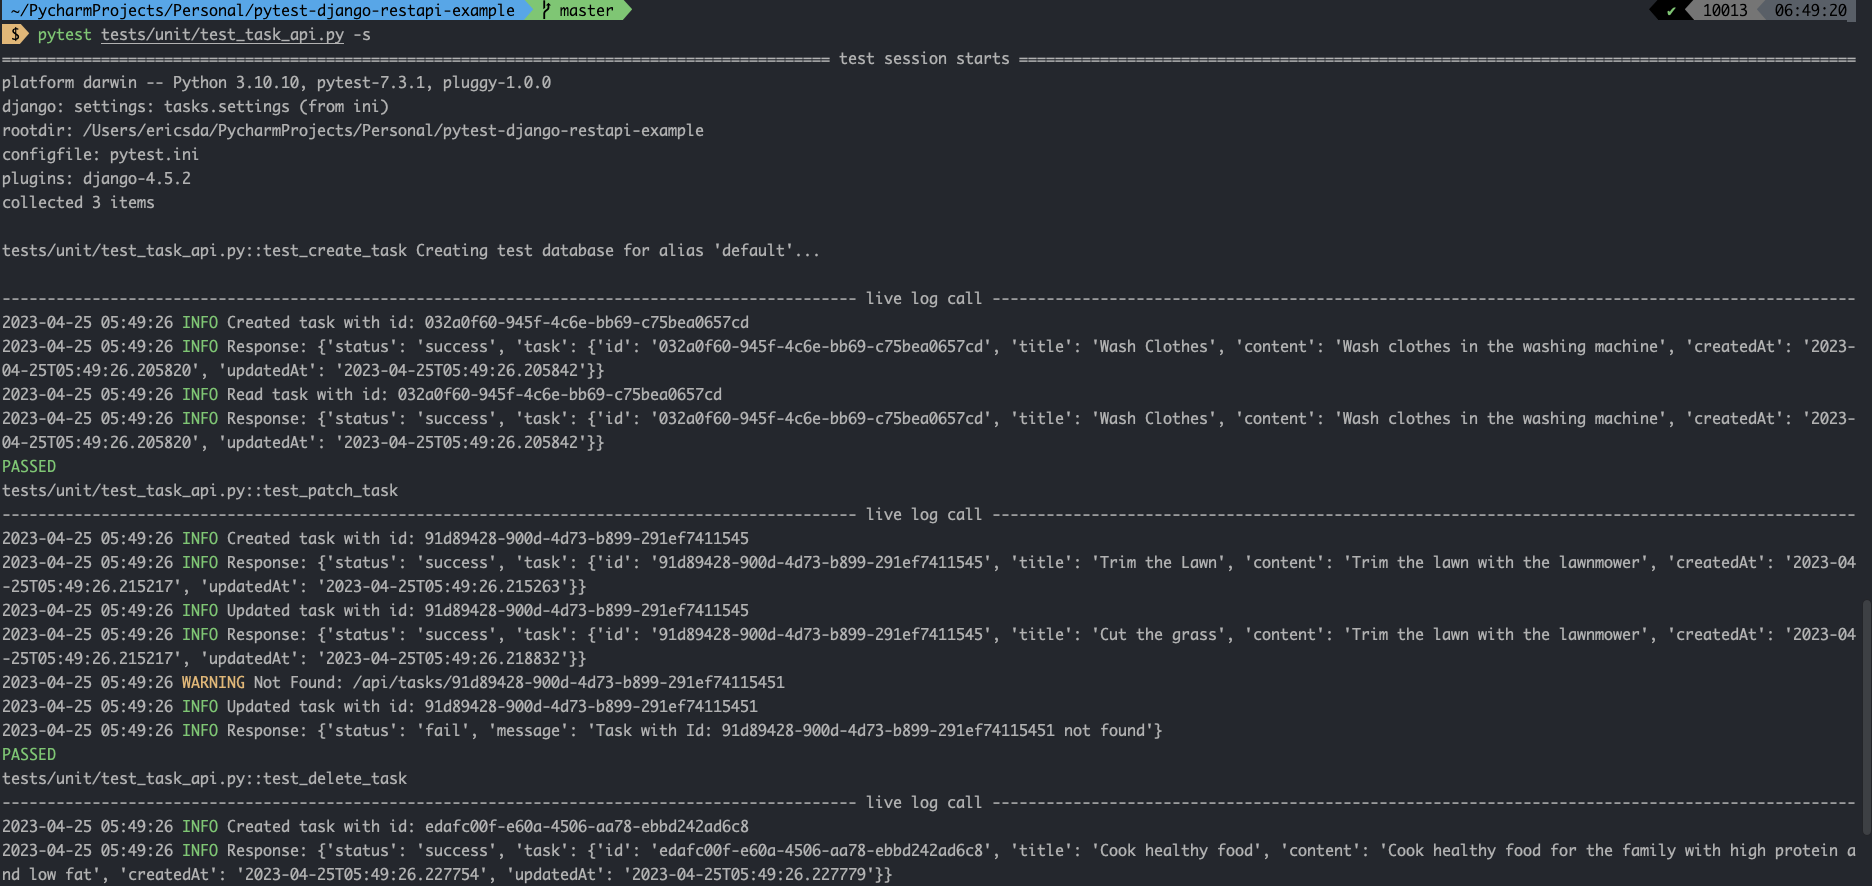
Run the Tests
Now let’s run the tests.1
pytest tests/unit/test_task_api.py -s

Create Documentation for the CRUD API
How useful is your API if nobody uses or gets value out of it?
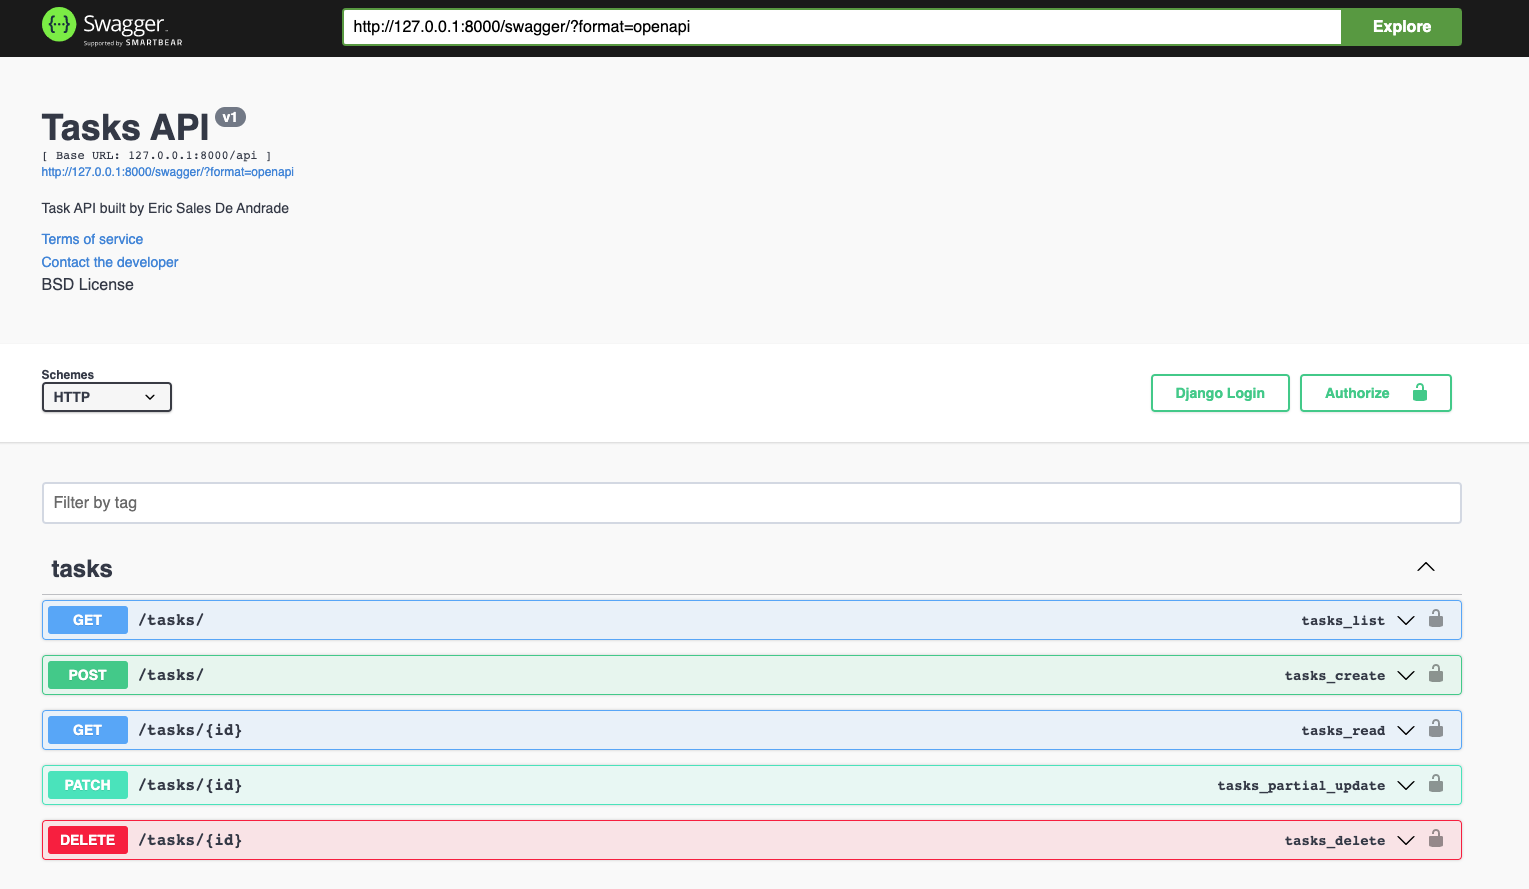
Documentation is very important and a Swagger provides a clear understanding of the various API endpoints, expected Client payloads and response meaning.
The good news is that you can auto-generate documentation.
We’ll make use of the drf-yasg package to generate this.
In the settings file, define the package.
tasks/settings.py1
2
3
4
5
6
7
8
9
10
11
12INSTALLED_APPS = [
"django.contrib.admin",
"django.contrib.auth",
"django.contrib.contenttypes",
"django.contrib.sessions",
"django.contrib.messages",
"django.contrib.staticfiles",
"task_api",
"rest_framework",
"corsheaders",
"drf_yasg",
]
To add the Swagger and Redoc tools to our base URL we’ll need to update our urls.py file.
tasks/urls.py1
2
3
4
5
6
7
8
9
10
11
12
13
14
15
16
17urlpatterns = [
path("admin/", admin.site.urls),
path("api/tasks/", include("task_api.urls")),
re_path(
r"^swagger(?P<format>\.json|\.yaml)$",
schema_view.without_ui(cache_timeout=0),
name="schema-json",
),
re_path(
r"^swagger/$",
schema_view.with_ui("swagger", cache_timeout=0),
name="schema-swagger-ui",
),
re_path(
r"^redoc/$", schema_view.with_ui("redoc", cache_timeout=0), name="schema-redoc"
),
]
Here we’ve added 3 new paths.
Now, restart your server1
python manage.py runserver
Visit http://localhost:8000/swagger/ in your browser and you should see your Swagger documentation.
Feel free to test it.
Conclusion
So here we are. The end.
I hope this article has been useful and you were able to follow the tutorial and set up a CRUD REST API with Django.
In this tutorial, you learnt about Django, its history and its use as a REST framework beyond its powerful web capabilities.
You learnt about CRUD APIs and how to define and set up the boilerplate in Django to define views, endpoints and custom logic.
We also saw how to test our API with Postman and write powerful Unit Tests in Pytest, leveraging the APIClient fixture to test the CRUD functionality of our API.
Lastly, you learnt how to auto-generate Swagger documentation for your API.
If you have ideas for improvement or like for me to cover anything specific, please send me a message via Twitter, GitHub or Email.
Till the next time… Cheers!
Additional Reading
This article was made possible by the support from the following articles and source documentation.