How To Generate Beautiful & Comprehensive Pytest Code Coverage Reports (With Example)
As a good developer, how do you ensure your code always works as expected?
Perhaps your boss asks, “have you tested all conditions and use cases?”
One of the most beautiful bits of programming is its deterministic nature. We tell a machine what to do, and it does the same thing—every single time.
But let’s be realistic, sometimes the real world (particularly Users) use your application in ways that you never could have predicted. Expecting it to work just fine.
How do you engineer or account for this?
You guessed right? By unit testing your code against various use cases. Make sure every line of code does exactly what’s expected.
Pytest code coverage reports allow us to quantify what % of our source code has been unit tested.
Below, we’ll discuss whether a High Coverage % is an indicator of Bug-Free Code (if that even exists).
In this article, we’ll look at how to generate pytest coverage reports, including a real example using a Simple Banking App.
We’ll use deterministic data for now but in another article, I’ll show you how to achieve high code coverage using sample data-testing libraries like Hypothesis and Faker.
- Coverage Reports — What Are They?
- Are Code Coverage Reports Important?
- 100% Coverage Doesn’t Mean Bug-Free
- Is 100% Coverage Realistic?
- Generating Pytest Coverage Report — Example
- Quick Repo/Code Explanation
- Define Unit Tests
- Generate Pytest Coverage Reports
- Testing With Random Data — Good Idea?
- Conclusion
Let’s get started then?
Coverage Reports — What Are They?
So what are coverage reports and why do they exist?
In simple terms, a Coverage Report shows how a % measure of code that has been validated using a Unit Testing Framework (e.g. Unittest or Pytest).
Where 100% means you’ve validated every line of the module.
This is very helpful especially when we don’t know what test cases to write next.
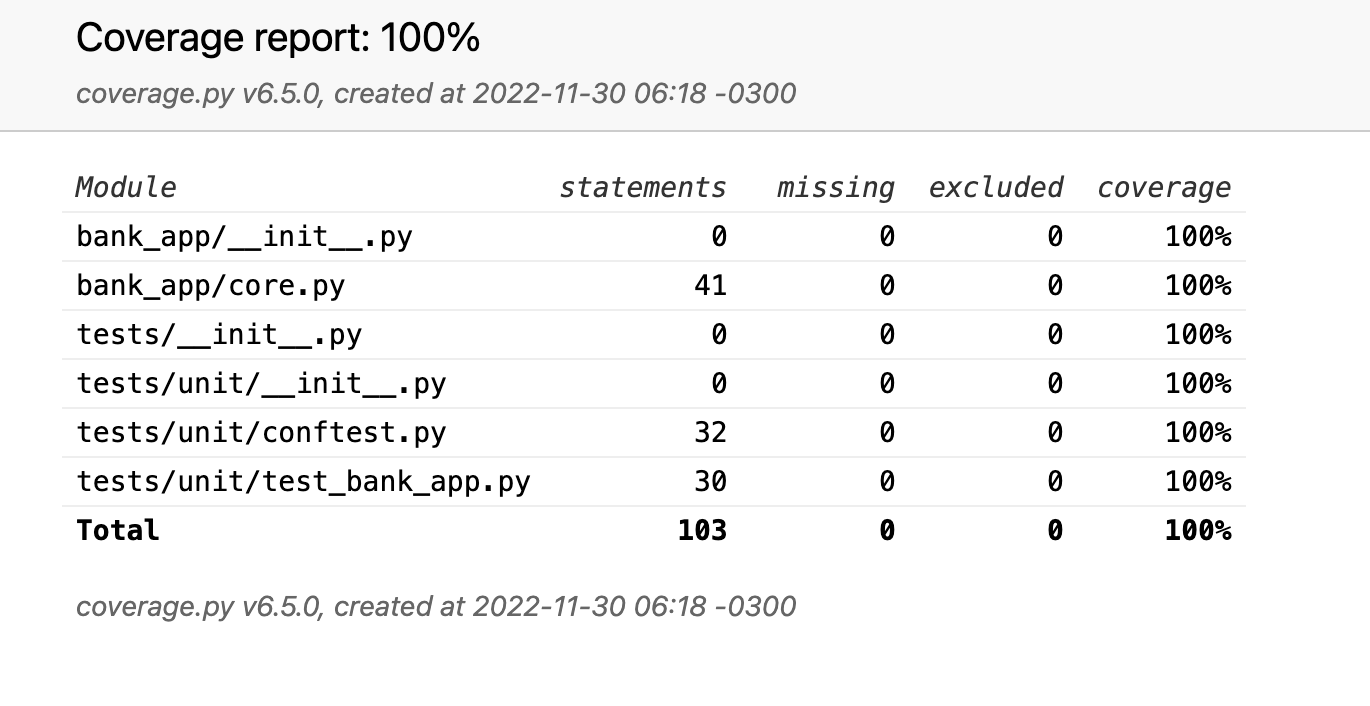
Coverage reports can be generated via the Terminal and viewed (and even shared) as a pretty HTML file that can be viewed in your browser.
Pretty cool eh?
Here’s what a coverage report HTML looks like.

Are Code Coverage Reports Important?
By very nature, this is a personal and or company preference.
A lot of companies will require a coverage report check during a PR (Pull Request) or CI pipeline.
Achieving 100% code coverage just means you have tested what you have written.
100% Coverage Doesn’t Mean Bug-Free
There is no 1–1 relation between Pytest Code Coverage Reports and the # of bugs in your application. This is just a way to confirm you’ve tested the code.
If you have missed logic or haven’t handled exceptions or dependencies the code will still fail, in spite of 100% test coverage.
Is 100% Coverage Realistic?
OK in our example below, we achieve 100% pytest code coverage.
In the real world, this is often far from possible.
Real-world applications are complex, split across multiple files and modules and communicate with external databases and cloud services.
While you can use libraries like Moto for mocking AWS services or another form of patching, these tests can get complicated to maintain and scale.
The next thing is time constraints. It’s unlikely in your job you have the luxury to spend days on Unit Testing after you’ve written an application.
Teams need new feature roll out and bug fixes ASAP.
As long as you’ve tested the core logic for most use cases you can think of, with a reasonably high code test coverage, that’s great by most standards.
Now let’s look at how we actually do this using our Bank App Example.
Generating Pytest Coverage Report — Example
Let’s start with a quick explanation of the repo and source code.
Please ensure to create a virtual environment and install the required packages as included in the requirements.txt file.
We’ll be using the Coverage Library to generate Pytest Coverage Reports.
Quick Repo/Code Explanation
The pytest-code-coverage-example repo consists of a Bank App under bank_app/core.py file.
core.py1
2
3
4
5
6
7
8
9
10
11
12
13
14
15
16
17
18
19
20
21
22
23
24
25
26
27
28
29
30
31
32
33
34
35
36
37
38
39
40
41
42
43
44
45
46
47
48
49
50
51
52
53
54
55
56
57
58
59
60
61
62
63
64
65
66
67
68
69
70
71
72
73
74
75
76
77
78
79
80
81
82
83
84
85
86
87
88
89
90
91
92
93
94
95
96
97
98
99
100
101from datetime import datetime
def calculate_diff_in_years(date_x: str) \
-> int:
"""
Function to calculate the difference
between defined date string and today's date.
:param date_x: Valid Date String
in '%d-%m-%Y' format e.g. "01-01-2005"
:return: Difference in years - int
"""
date_x_date = datetime.strptime(date_x, "%d-%m-%Y").date()
date_difference = datetime.today().date() - date_x_date
duration_in_s = date_difference.total_seconds()
years = divmod(duration_in_s, 31536000)[0]
return years
class BankApp:
"""A Simple Bank App"""
def __init__(
self,
name: str = None,
dob: str = None,
move_in_date: str = None,
monthly_income: int | float = None,
) -> None:
self.name = name
self.dob = dob
self.move_in_date = move_in_date
self.monthly_income = monthly_income
def check_id(self) -> bool:
"""
Function to check if ID exists
based on Name, DOB and Move In Date
:return: Bool
"""
if all(v is not None for v in
[self.name, self.dob, self.move_in_date]):
return True
return False
def check_time_at_address(self) -> bool:
"""
Function to check time at current
address >= 3 years
:return: Bool
"""
years_at_address = calculate_diff_in_years(
date_x=self.move_in_date)
if years_at_address >= 3:
return True
return False
def check_age(self) -> bool:
"""
Function to check age >= 18 years
:return: Bool
"""
age = calculate_diff_in_years(date_x=self.dob)
if age >= 18:
return True
return False
def check_monthly_income(self) -> bool:
"""
Function to check if Monthly Income > 1000
:return: Bool
"""
if self.monthly_income > 1000:
return True
return False
def credit_check(self) -> dict:
"""
Function to perform credit check.
Approved: If Valid ID, time at
address >=3 years, age > 18 and monthly income > 1000
Declined: If above conditions not met
:return: Dict containing APPROVED or DECLINED status.
"""
response = {"Status": "DECLINED"}
check_id_ = self.check_id()
check_time_at_address_ = self.check_time_at_address()
check_age_ = self.check_age()
check_monthly_income_ = self.check_monthly_income()
if all(
v
for v in [
check_id_,
check_time_at_address_,
check_age_,
check_monthly_income_,
]
):
response = {"Status": "APPROVED"}
return response
return response
This file contains a class BankApp which has a few methods. The class requires some optional initialisation parameters — name , dob , move_in_date and monthly_income .
The class has 5 methods, each performing an independent check with a final credit_check() method at the end.
There is also a helper method calculate_diff_in_years to find a difference in years between two dates.
The goal of this app is to decide if the Customer should get a loan or not, based on a simple fictitious credit check
name,dob,move_in_dateare specified and notNone.move_in_date≥ 3 years.- Age ≥ 18 years old.
monthly_income≥ 1000.
The check_credit() function returns a Dict Response with an APPROVED or DECLINED message.
The Unit Tests can be found under /tests/unit/ folder.
Define Unit Tests
Please note we’ve used conftest.py to define fixtures that can be used throughout the Unit Tests.
If you’re unfamiliar with conftest I highly recommend you have a quick skim through of my article on Pytest Conftest and Best Practices.
The test_bank_app.py file contains several Unit Tests, each to check the various conditions — PASS or FAIL route.
conftest.py1
2
3
4
5
6
7
8
9
10
11
12
13
14
15
16
17
18
def bank_app_check_monthly_income_true():
return BankApp(
name="Eric Sales De Andrade",
dob="01-01-2005",
move_in_date="01-01-2022",
monthly_income=3000,
)
def bank_app_check_monthly_income_false():
return BankApp(
name="Eric Sales De Andrade",
dob="01-01-2005",
move_in_date="01-01-2022",
monthly_income=100,
)
test_bank_app.py1
2
3
4
5
6
7
8
9
10
11
12
13
14
15
16
17
18
19
20def test_monthly_income_true(bank_app_check_monthly_income_true) -> None:
"""
Test to check if monthly income >= 1000 condition is True
:param bank_app_check_monthly_income_true:
Fixture (defined in conftest.py)
:return: None
"""
response = bank_app_check_monthly_income_true.check_monthly_income()
assert response is True
def test_monthly_income_false(bank_app_check_monthly_income_false) -> None:
"""
Test to check if monthly income >= 1000 condition is False
:param bank_app_check_monthly_income_false:
Fixture (defined in conftest.py)
:return: None
"""
response = bank_app_check_monthly_income_false.check_monthly_income()
assert response is False
Generate Pytest Coverage Reports
Once you’ve written your Unit Tests (and assuming you’ve installed the Coverage package) you can run the below command to generate your coverage report.1
coverage run -m pytest tests/unit/test_bank_app.py

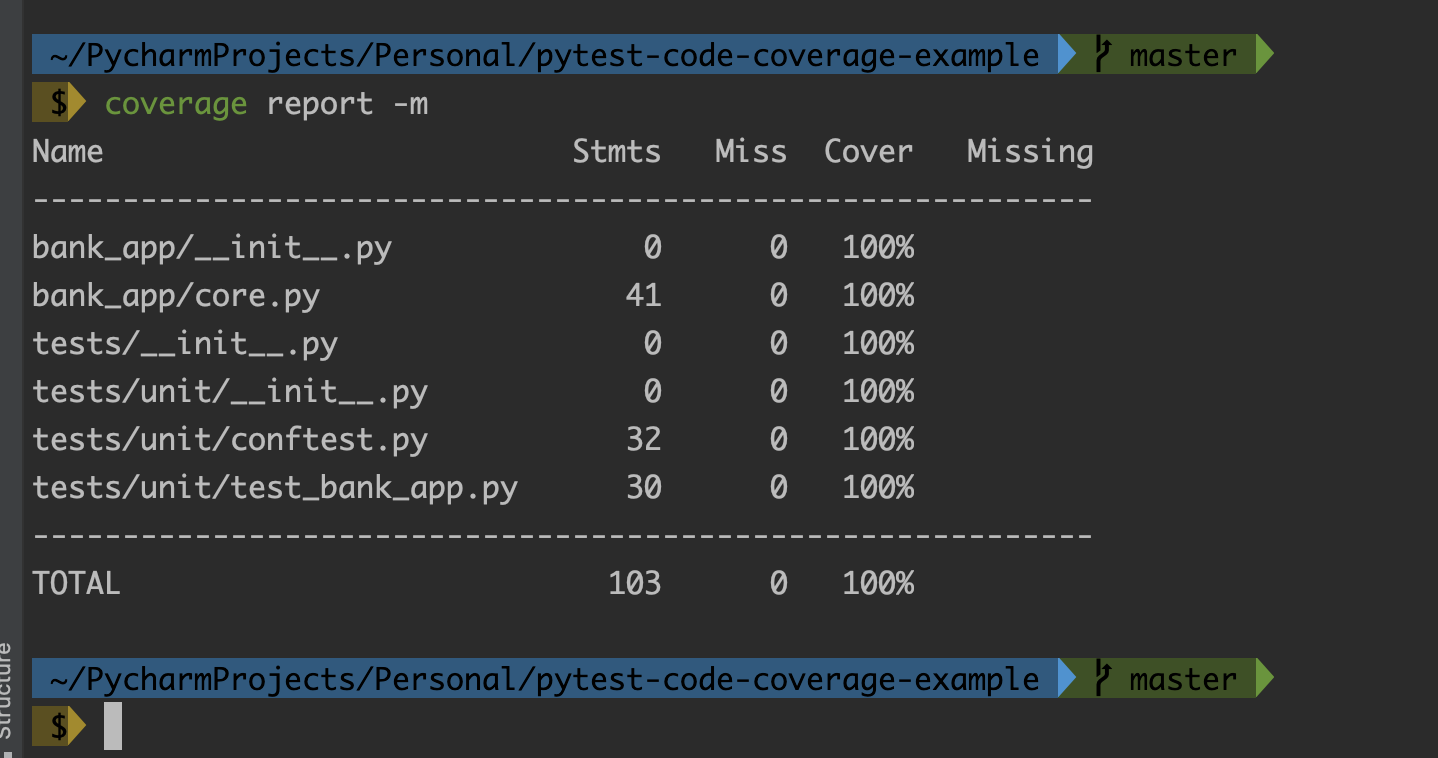
Now to view your coverage report in the terminal, run1
coverage report -m

Lastly, to generate your beautiful HTML File please run1
coverage html

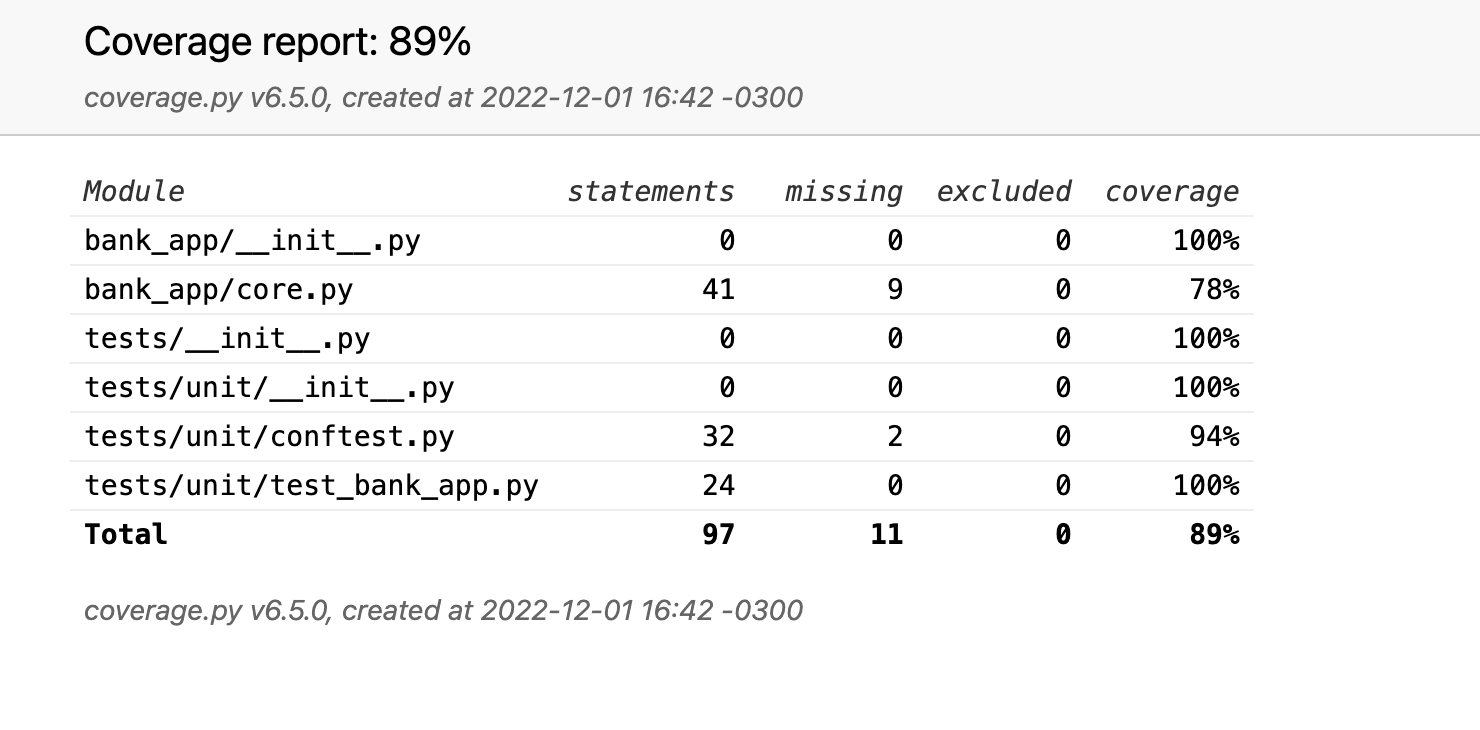
Now navigate to htmlcov/ directory and click on the index.html file. This should open up a nice coverage report file in your default browser.

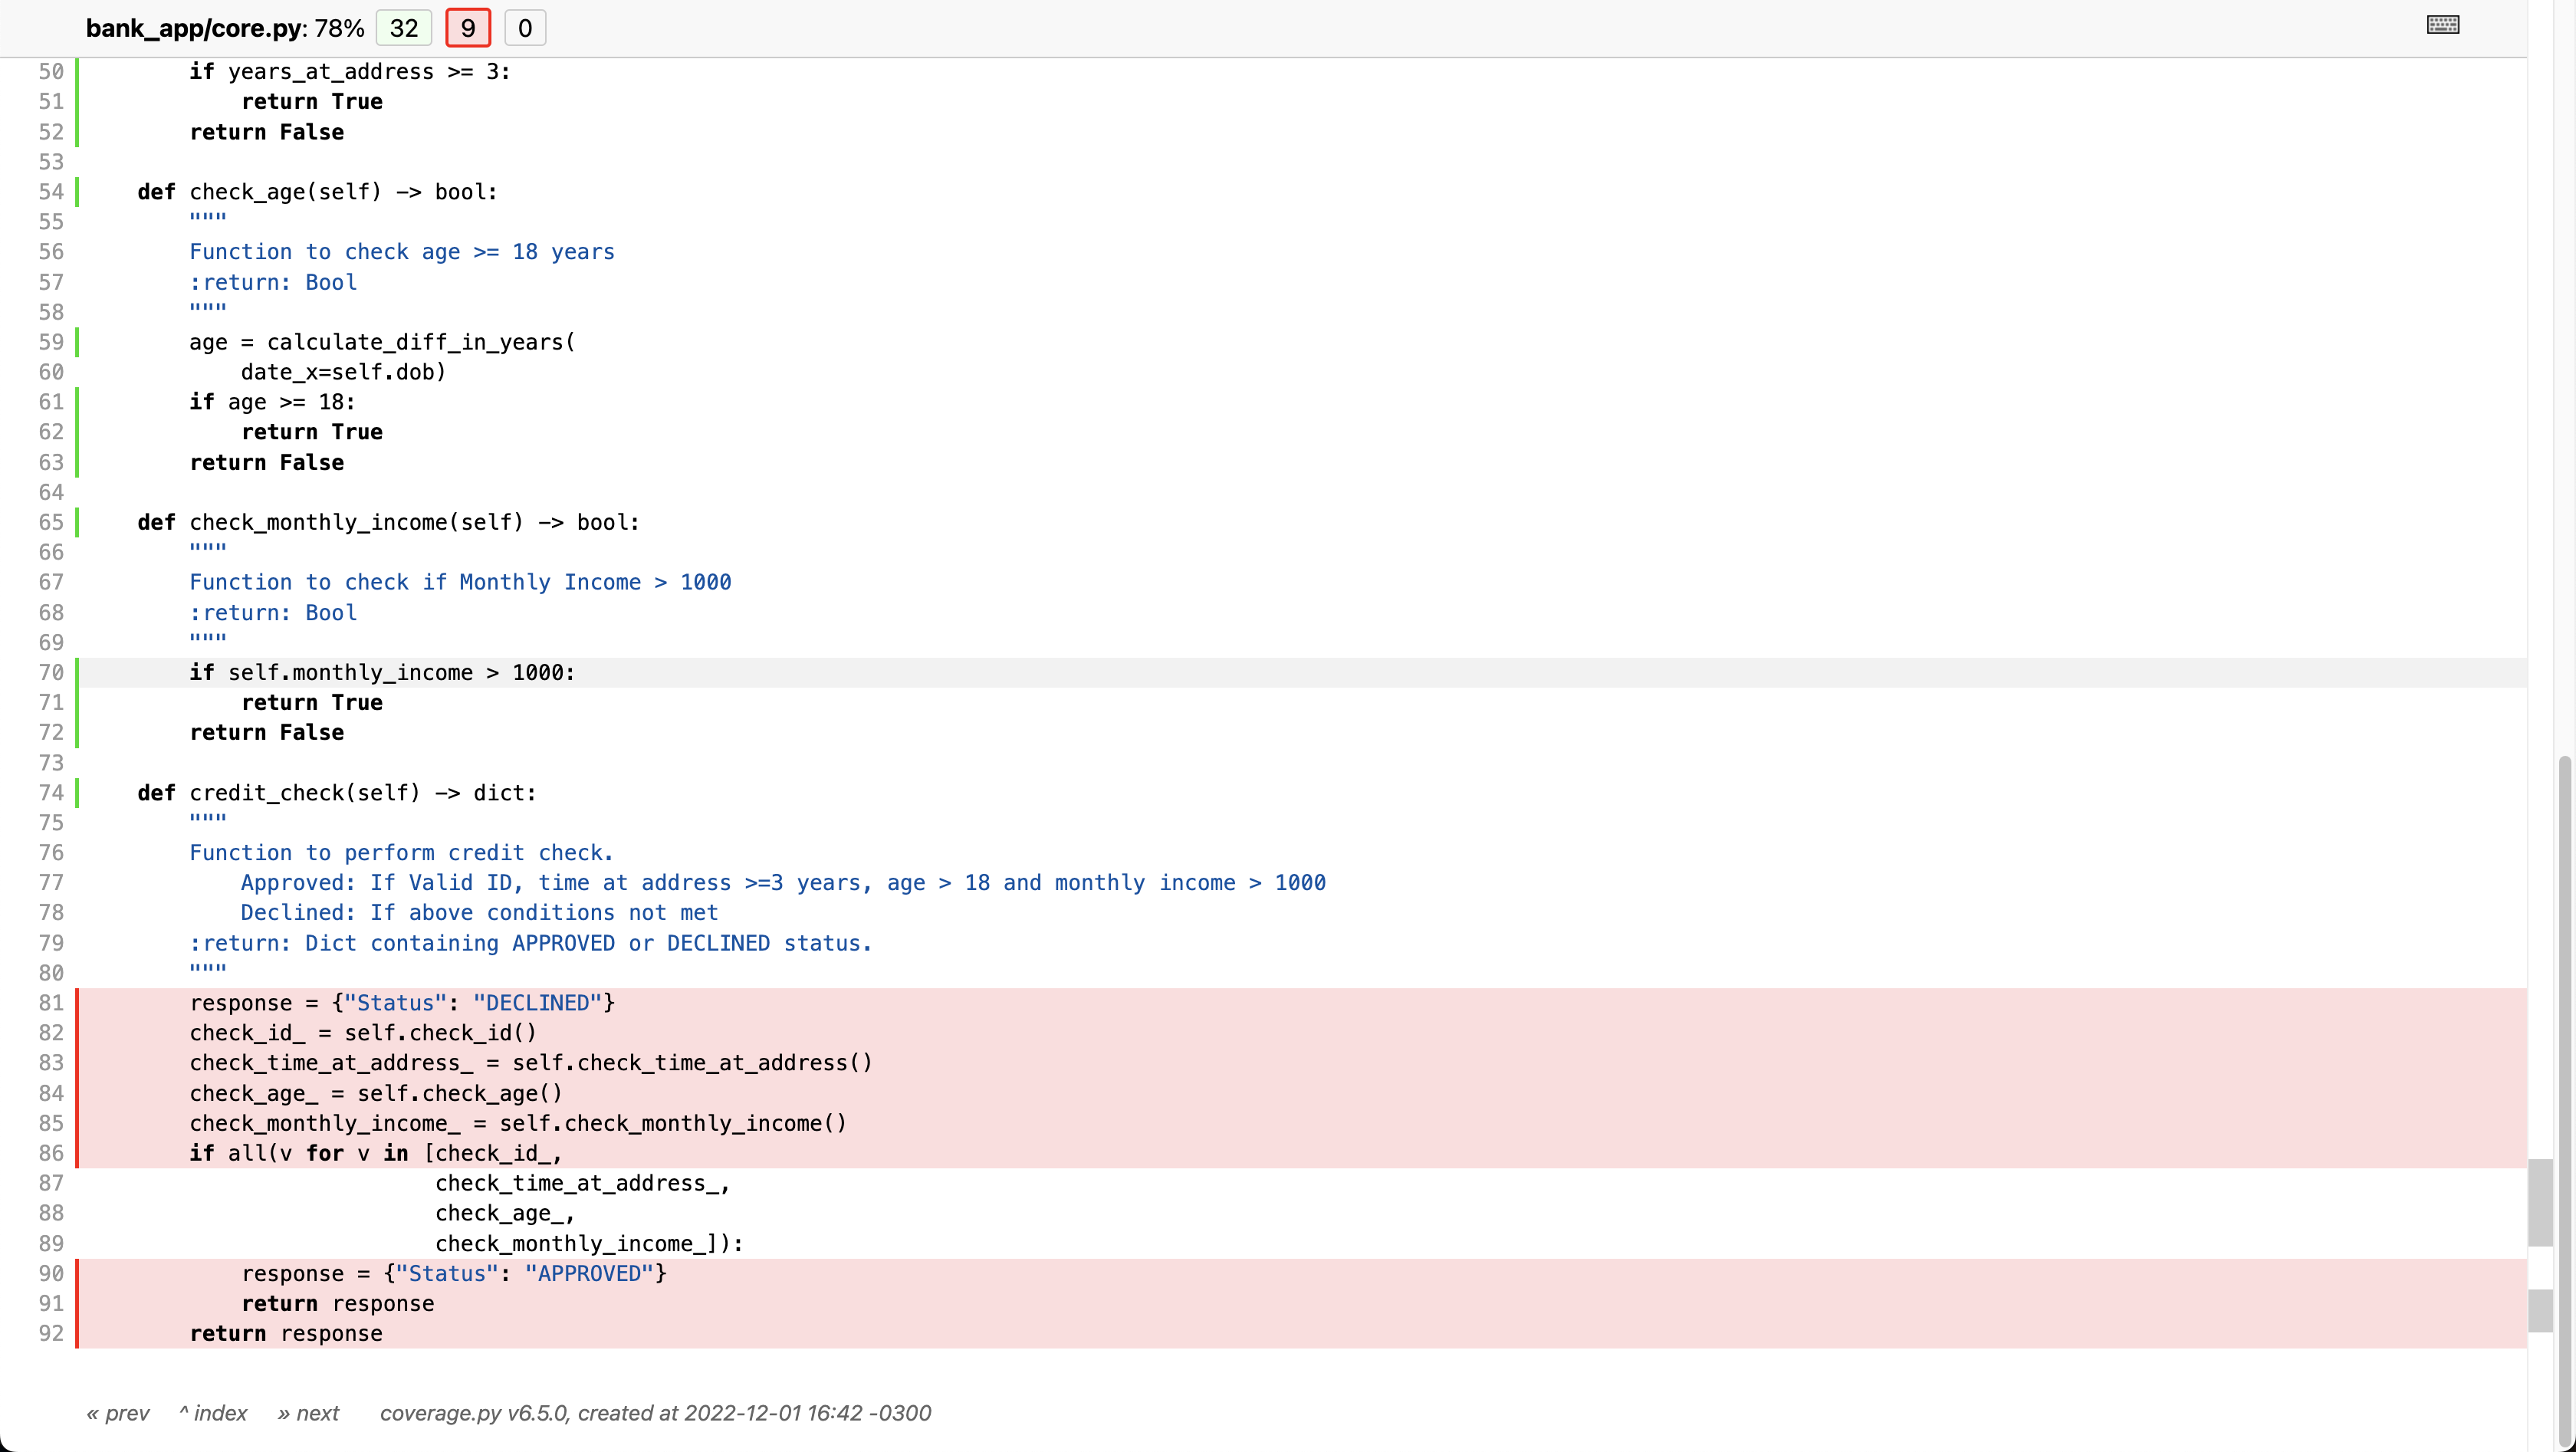
If your Coverage is incomplete you should see a report similar to below, showing you in red exactly what parts of the code you need to test.


Testing With Random Data — Good Idea?
Now that you know the use and importance of test coverage, should you run tests with deterministic or random data?
This is a question that’s generated widespread opinionated responses on the internet.
Unless you’re working with Machine learning or AI, it’s mostly a good idea to run tests with predictable data.
Because you know exactly what the result will yield.
That said, there are some interesting libraries to generate schema-based test data that can bridge the gap between deterministic and unknown.
For example, Hypothesis and Faker are two very interesting libraries.
In a future article we’ll learn how to generate schema-based testing data for your Python source code but know that it’s not a bad idea.
If you use a schema and model validation framework like Pydantic (it’s my favourite), it should be very easy to handle new data with a strongly typed schema.
Conclusion
I hope this has been helpful.
In this article, we looked at What are Pytest Coverage Reports and why you’d consider including them.
We also looked at How to generate coverage reports using a simple Banking App example.
Lastly, we spoke about the generation of randomised test data for your Unit tests using interesting libraries like Hypothesis.
In a future article, we’ll talk more about randomised testing versus deterministic testing.
If you have any ideas for improvement or like me to cover any topics please comment below or send me a message via Twitter, GitHub or Email.
Till the next time… Cheers!